When we teach young children the alphabet, we are asking them to learn several pieces of information that need to become connected: what a letter looks like, what it is called, and the sound it represents.
One research-supported way to help young children make those connections is through embedded mnemonic alphabet instruction.
With an embedded mnemonic, the keyword picture is actually incorporated into the shape of the letter. Instead of seeing an S next to a picture of a snake, for example, the S itself looks like a snake.
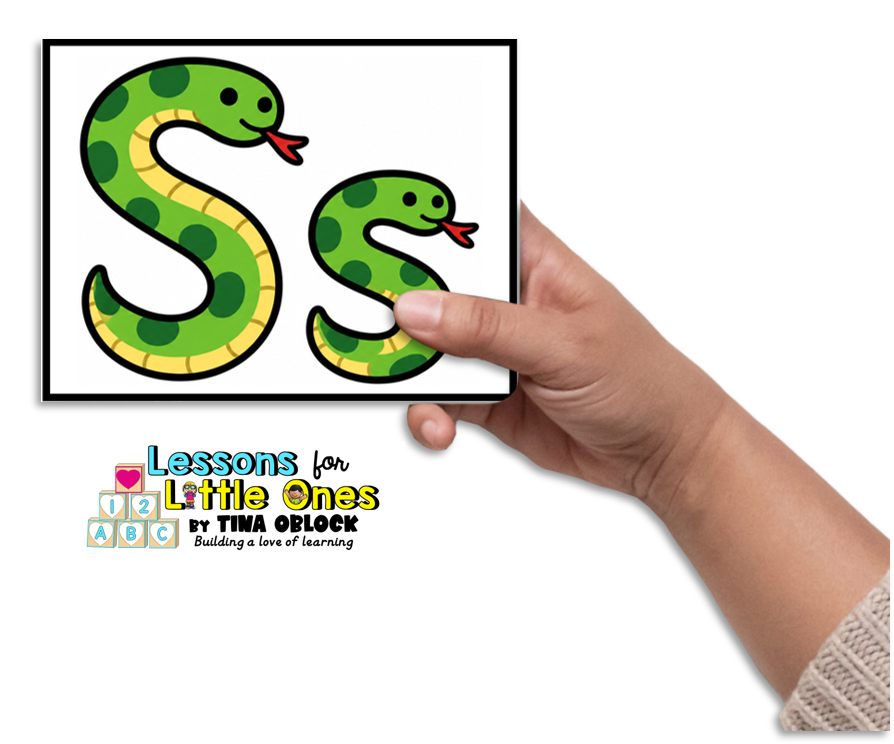
That visual connection is what makes embedded mnemonics different from simply pairing a letter with a separate picture.
That may seem like a small difference, but research has found that it can make letter-sound learning more effective.
What Does Research Say About Embedded Mnemonics?
Embedded picture mnemonics have been studied for decades.
In an early study by Ehri, Deffner, and Wilce, children were taught letter-sound associations in different ways. Some saw pictures that incorporated the letter directly into the picture, while others saw the same keyword pictures without the letter embedded into them or learned without pictures.
The children who learned with the integrated, embedded pictures learned more letter-sound associations than the other groups.
Later research has continued to support their use. Reviews of the research have reported that embedded mnemonics can help children learn letters and sounds with less repetition and confusion, improve retention, and help children apply what they have learned to reading and spelling.
More recently, Roberts and Sadler found that children taught with embedded mnemonics learned, on average, about twice as many letter sounds as children in the comparison instruction. They also identified more initial phonemes.
In other words, the picture isn’t there just to make the alphabet cute.
It is there to serve as a memory cue that is connected directly to the letter form and sound. Much like many of us may use Roy G. Biv as a cue to recall the colors of the rainbow or “Righty-tighty, lefty-loosey” to cue the recall of which way to turn common screws and nuts.
What Makes an Embedded Mnemonic Different?
This is an important distinction.
Imagine showing a child:
S + a separate picture of a snake
The child has to connect two separate things.
With an embedded mnemonic, the snake takes the shape of the S. The letter and the meaningful picture become one visual.
The keyword also provides a sound connection:
/s/ → snake → S
That gives students a meaningful pathway back to the sound and letter.
When I created my mnemonic alphabet, I also wanted the actual shape of the letter to remain very clear. The picture adds the memory cue without hiding the letter students ultimately need to recognize.
The lowercase letter is included right along with the uppercase letter so students can begin making those connections with both forms.
For example:
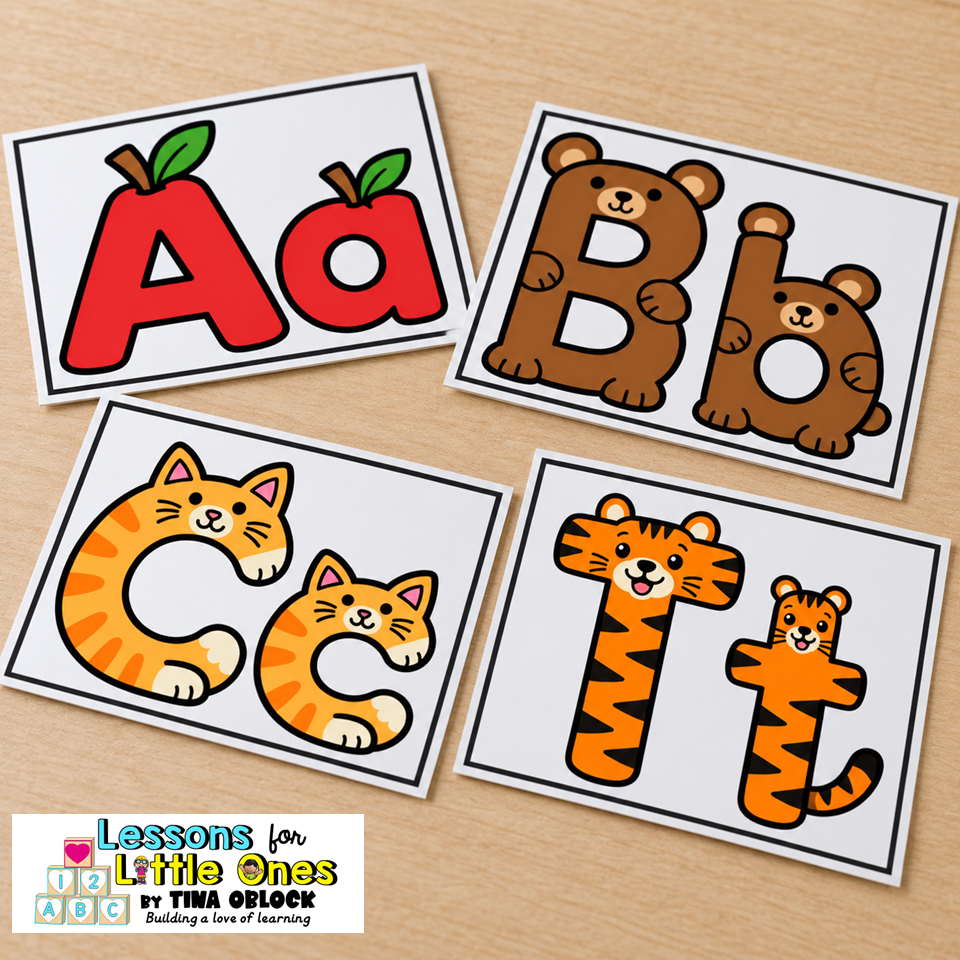
- A is an apple
- B is a bear
- C is a cat
- T is a tiger
How to Use Mnemonic Alphabet Cards
Introduce the letter sound first. Say the letter sound and have students repeat it.
Show the card and see if students can tell you the embedded picture. Make the connection between the letter sound and the picture using beginning sound isolation. For example, /s/, /s/, snake.
Point out how the image is part of the letter itself. Show how the shape of the picture is actually the same shape as the letter.
Make the connection. Help students say and make the connection between the letter sound – embedded mnemonic picture – letter name.
Research on alphabet instruction emphasizes continued review. We don’t have to teach a letter, check it off our list, and never return to it. Bringing previously taught letters back into instruction gives students repeated opportunities to strengthen those associations.
This is also a great time to mix in previously taught letters rather than practicing the new letter in isolation over and over again.
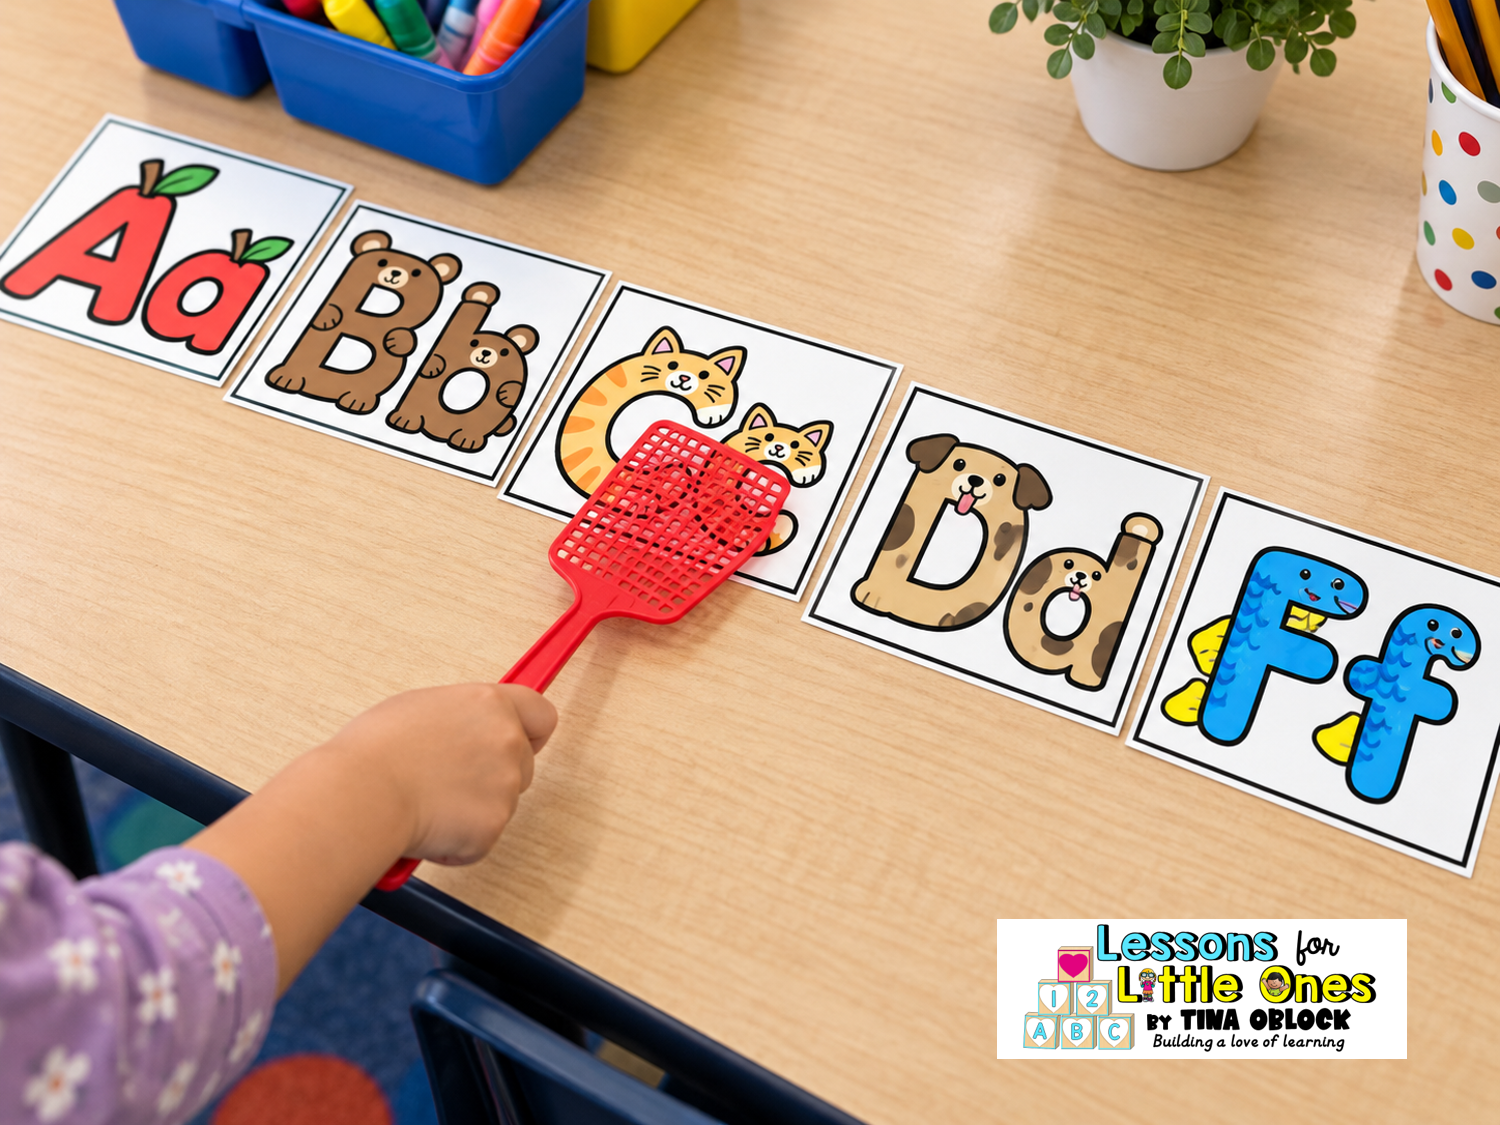
To make review more fun, you can play games during small group, like Sound Splat, where you say a sound and students swat the correct mnemonic alphabet card with flyswatters or special pointers.
You can also play Find and Flip, where you lay the mnemonic alphabet cards face down and say a letter sound. Students flip over cards to find the correct letter match. If it is incorrect, they say the letter sound and name for practice before turning it back over. When they find the correct card, they say the letter sound and name and keep the card turned over.
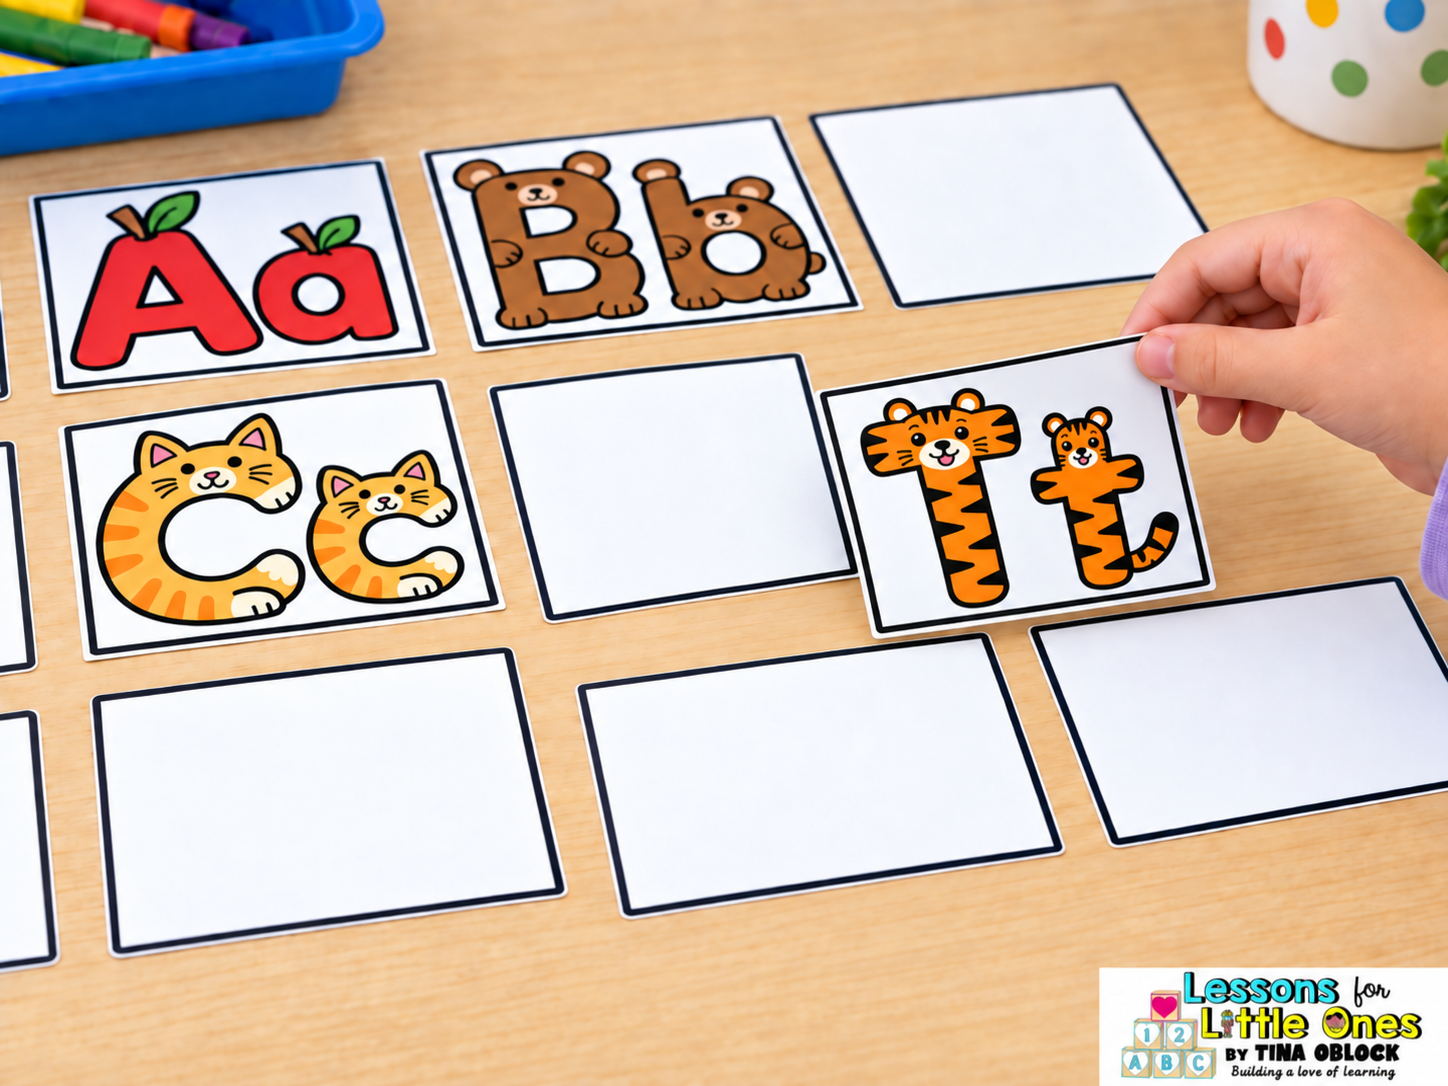
The mnemonic isn’t the entire alphabet lesson. It is a memory support within your explicit instruction.
Science of Reading Aligned Mouth Photo Mnemonic Alphabet Cards
Since research has shown that explicitly teaching and drawing attention to the mouth movements for each phoneme helps anchor the sounds into memory, I like using real mouth photos when introducing letters.
Combining mouth photos with the embedded mnemonic keyword picture helps students learn the sound-letter connection and better distinguish between similarly sounding letters.
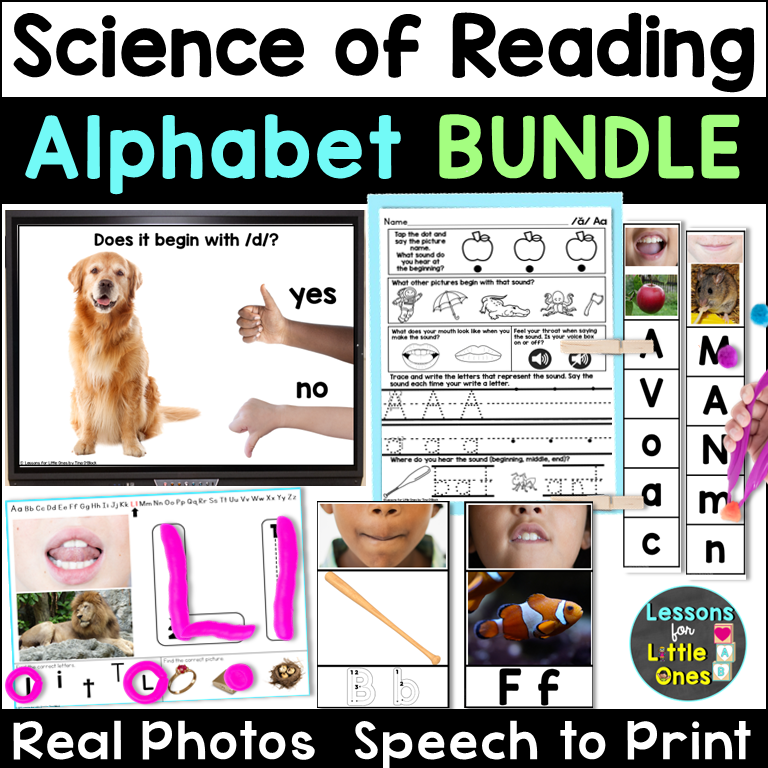
I created real mouth photo speech-to-print mnemonic alphabet cards to make this easy to teach.
The cards help students move through this progression:
Speech Sound → Mouth Formation → Mnemonic Keyword → Print
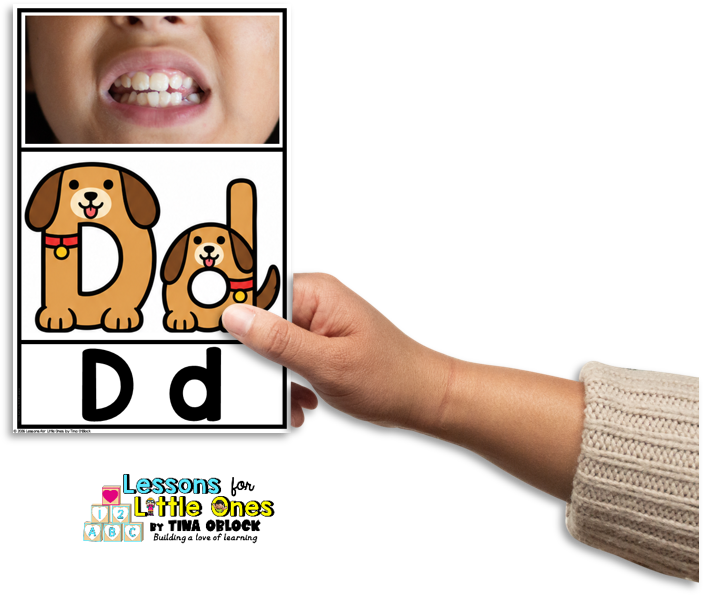
Say the sound and have students repeat it.
Then show them the real mouth photograph and talk about what your mouth is doing.
Depending on the sound, you might draw attention to:
- whether the lips are open or closed
- where the tongue is positioned
- whether the teeth are involved
- whether air continues to flow or stops
- whether students feel vibration in their throat
You don’t need to turn this into a complicated speech lesson. The idea is simply to help children become more aware of what they are doing when they make the sound.
Try Mirrors During Sound Practice
One of my favorite ways to do this is with small mirrors.
Have students make the sound while watching themselves.
Can they make their mouths look like the mouth on the card?
Have them notice their lips, tongue, and teeth.
If you don’t have individual mirrors, the front-facing camera on a classroom device can work too.
Students usually love being able to actually see themselves making the sounds.
Say the name of the embedded mnemonic keyword picture, using beginning sound isolation (pronounce the first phoneme in a word, then say the whole word). You can say something like “/d/, /d/, dog”. Have students repeat.
Explain that the sound is at the beginning of the keyword. Isolating the beginning sound helps students understand that words are made up of a series of sounds.
You can also build a little additional phonemic awareness practice into the lesson before moving to the printed letter name.
Say several words aloud.
Some should begin with your target sound and some should not.
Students can give you a thumbs-up when they hear the sound and a thumbs-down when they don’t.
Finally, show students the printed letters and explain that these letters represent the sound they have been working with. It is how the sound is represented in print.
Point out the difference between the capital letter and the lowercase letter. Point to each letter and have students say the sound and letter name.
Show and say the proper letter formation followed by the letter sound. For example, for capital D say something similar to “Down, around. /d/”.
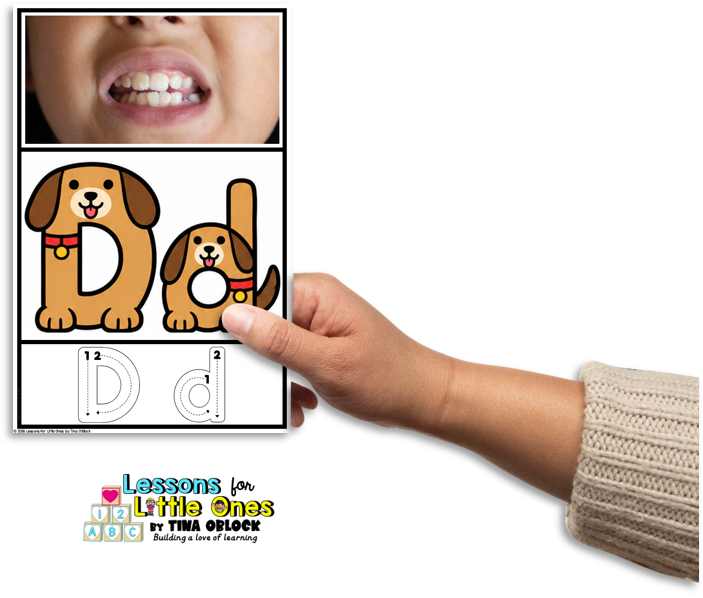
Then, have students air write each letter and say the sound when they are finished. Doing the muscle movements and writing the letters leaves a muscle memory in the sensorimotor part of the brain which helps students recognize letters. It also helps children better recognize the unique properties of each letter.
You’re gradually moving from something children can hear and produce to the symbol they will encounter in print.
Transition From the Mnemonic to the Regular Letter
The mnemonic picture is meant to be a support while young students are learning the connection.
Ultimately, we want students to see a regular S and know /s/ without needing the snake.
That is why I like deliberately showing students the mnemonic letter and the conventional printed letter.
You can even ask:
“What stayed the same?”
Help them notice the underlying letter shape.
As students become more secure with a particular letter and sound, give them more opportunities to respond to the plain letter without the picture.
The mnemonic has done its job when students no longer need it.
Research findings describe embedded mnemonics as a support for establishing the association, while conventional letters remain the information students ultimately need to recognize.
Use a Mnemonic Alphabet Poster for Review and Reference
I also like having the mnemonic alphabet available after the initial lesson.
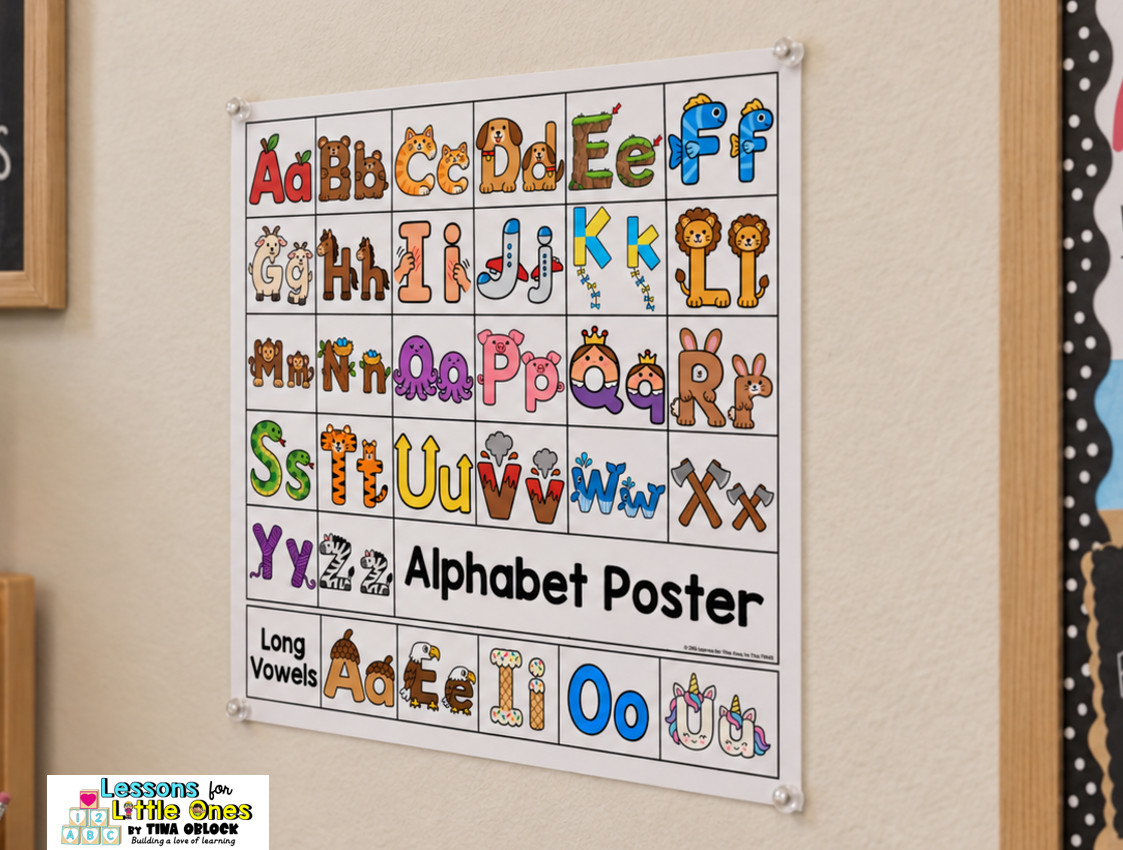
That is why I created a mnemonic alphabet poster. Instead of the poster simply being classroom decor, students can actually use it as a reference.
Connect Letter Sounds to Handwriting
Once students have worked with the sound and letter, you can bring in letter formation.
The mnemonic handwriting pages continue the same speech-to-print progression while helping students practice writing conventional uppercase and lowercase letters.
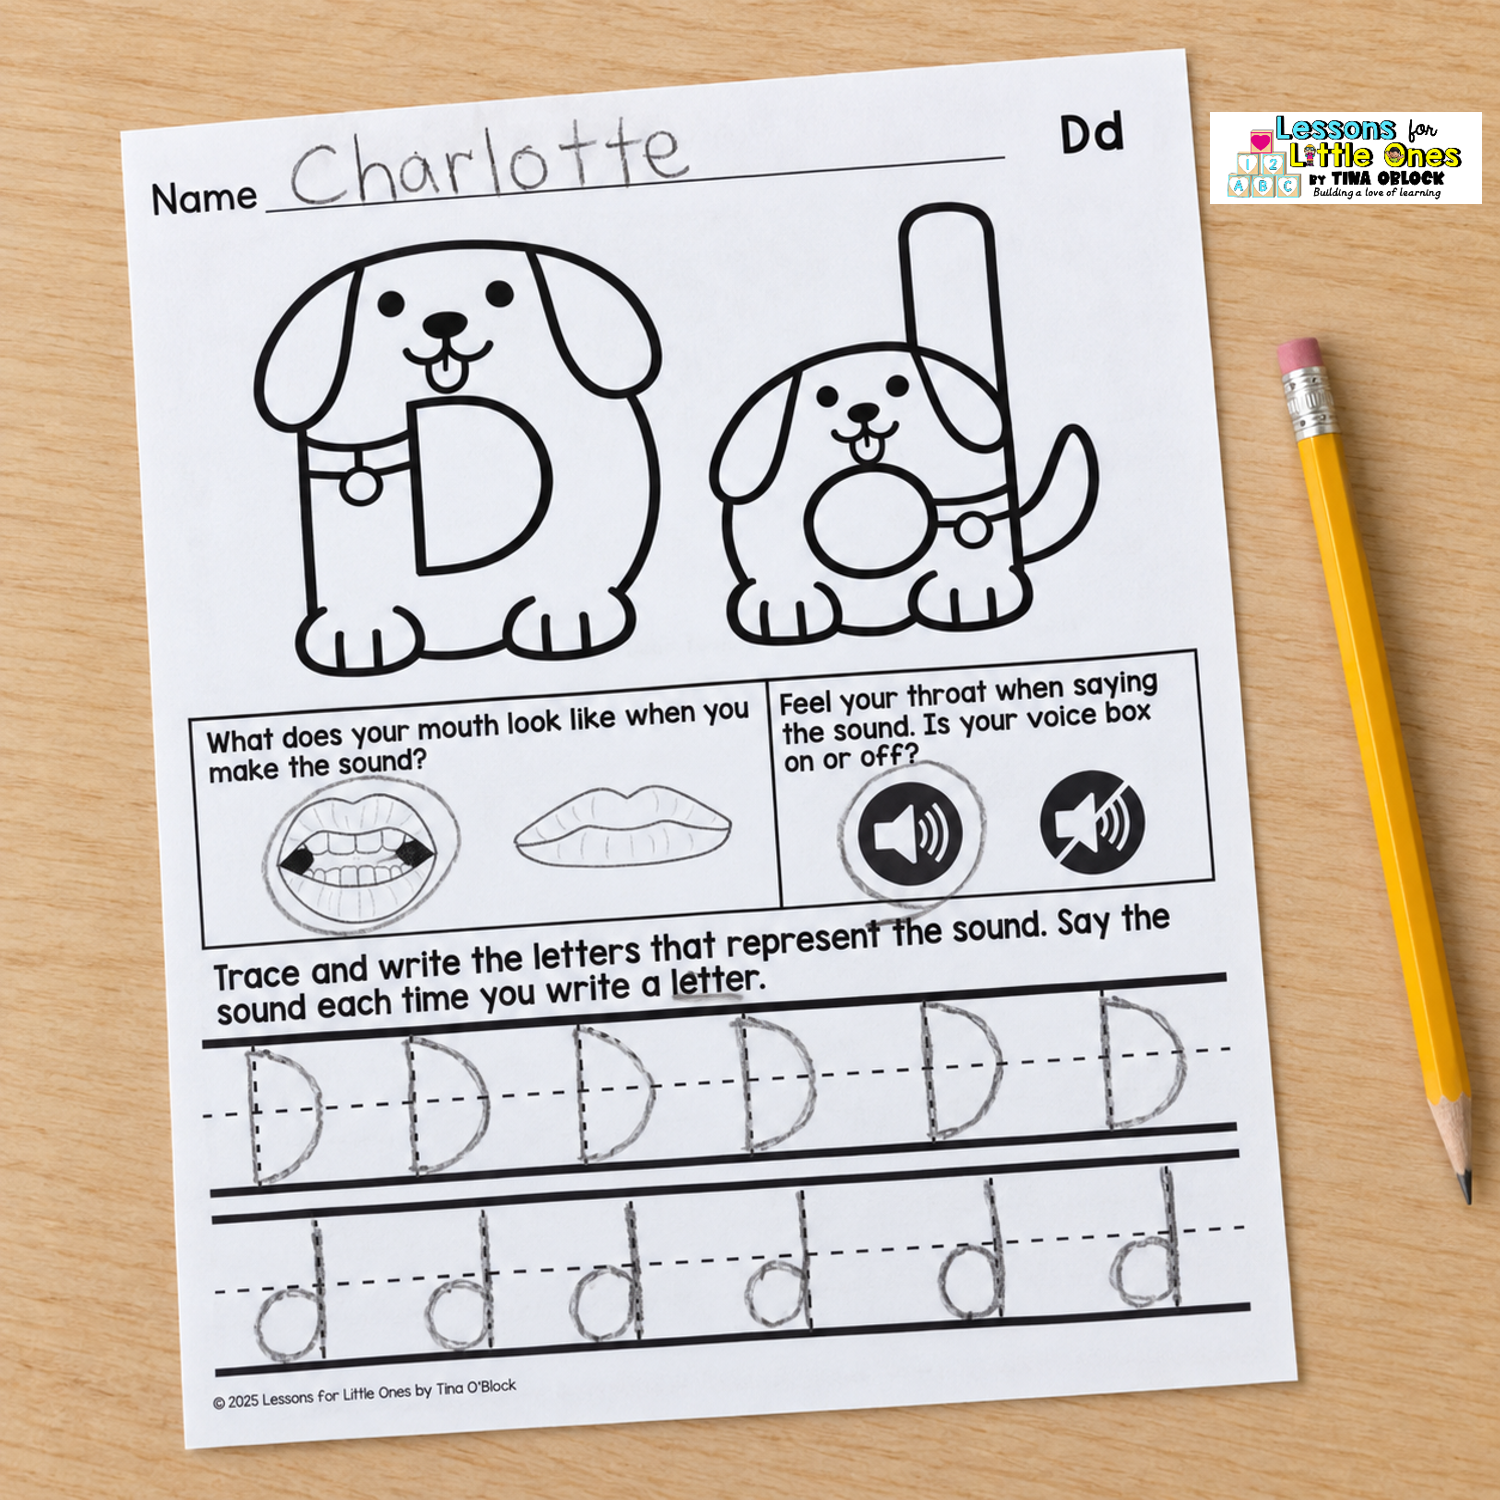
Again, we’re gradually moving away from the mnemonic and toward the traditional printed and written letter.
Ready-Made Mnemonic Alphabet Materials
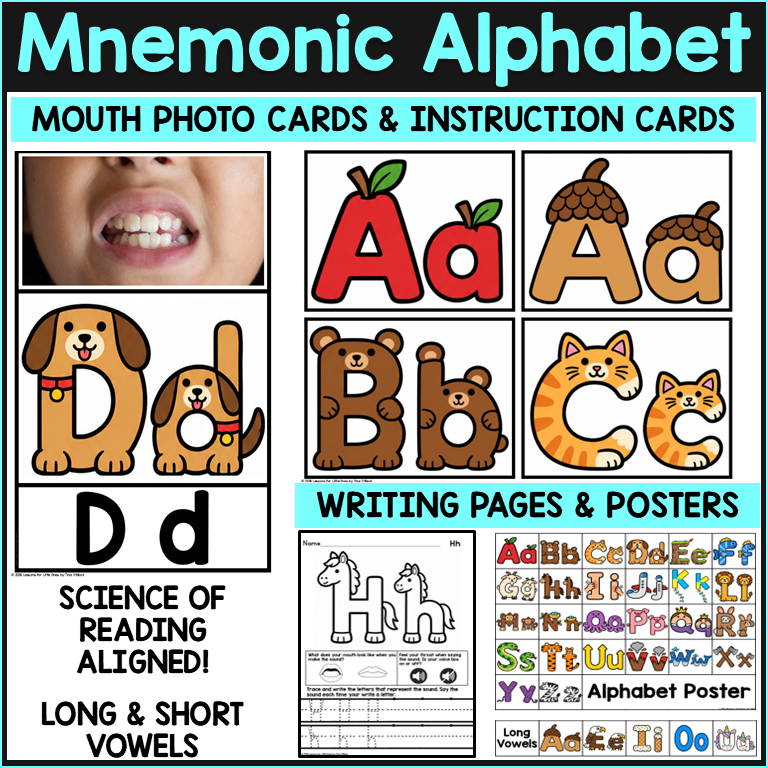
I created my Mnemonic Alphabet Cards, Mouth Photo Cards, Posters & Writing Pages because I wanted all of these pieces to work together without teachers having to create or gather them separately.
The resource includes:
- uppercase and lowercase embedded mnemonic instructional alphabet cards
- Science of Reading aligned real mouth photo speech-to-print mnemonic cards
- conventional printed letter models
- mnemonic alphabet posters
- separate short and long vowel mnemonics
- handwriting practice pages
You can use the materials for whole-group alphabet instruction, small-group practice, intervention, review, handwriting, and ongoing classroom reference.
My goal was to make it easy to:
Teach it. Review it. Practice it. Refer back to it.
So if you want to incorporate research-supported embedded mnemonics and a speech-to-print approach into your alphabet instruction without creating all the materials yourself, everything is ready for you in the complete resource. Click the cover image below for complete details and additional images.
You may also like:
Science of Reading Aligned Alphabet Instruction Plus a Free File