If you are a kindergarten or early elementary teacher and have been considering using a sound wall in your classroom but are not sure if it will work or how and where to set it up, this post will offer some helpful suggestions and options as well as some useful resources.
What is a sound wall and why should I use one in my classroom?
A sound wall focuses on the sounds (phonemes) and the letters/letter patterns that represent those sounds in words.
The goal of a sound wall is to help students become proficient readers and spellers by helping them build solid phoneme-grapheme correspondence. The sound wall helps young students become aware of the speech sounds in our English language and that these sounds can be put together to create words. After all, print is speech in visual form.
Young students come to us able to say sounds through speech (talking). Sound walls help them connect those sounds to how they are represented in print. In other words, they go from speech to print.
Sounds walls include the 44 phonemes (speech sounds) of our language, rather than just the 26 letters of the alphabet. Learning the phonemes makes reading/spelling less confusing for students. For example, if a student’s first name is “Chase” and it is placed under the alphabet letter “C” which he learns represents the /k/ sound as in “cat”, he will be confused. Placing it under the digraph “ch” will make more sense since he will learn that the /ch/ sound in the beginning of his name is represented in print by the two letters “ch”.
A sound wall is organized by place and manner of articulation (where in the mouth the sound is being produced and what is happening with airflow) rather than alphabetical. This helps students see what it takes in our brains and facial muscles to produce the sounds of our language.
Sound walls also create an awareness of articulation (how the sound is formed with the mouth) which helps young students better distinguish between sounds and letters/spellings.
Sound walls help students connect speech (what they already know) to print and build the phoneme-grapheme correspondence needed for decoding and reading words.
A sound wall is a very helpful teaching tool, but its success is very dependent on understanding why and how to use it with students. Therefore, I highly recommend attending professional development classes and/or doing some research on your own. Here are a few helpful resources to get you started. This is by no means a comprehensive list, but are a few favorites.
Helpful resources for learning more about sound walls:
Speech to Print book by Louisa Moats, Ed.D.
Mary Dahlgren: Retire Your Word Wall: How Sound Walls Support the Science of Reading (Podcast)
Mary Dahlgren: Sound Walls vs. Word Walls
Transitioning from Word Walls to Sound Walls
How to Set Up Your Sound Wall
Spacing
The first thing to consider is where to place your sound wall. Spacing and location are important when deciding where to put your sound wall in the classroom. The vowels and consonants should have a divider in between them or be placed on separate bulletin boards or walls; therefore, you need 2 fairly large bulletin boards, walls, or spaces.
You also want your sound wall to be easily accessible to both you and your students, so it should not be too high up.
Most sound walls will fit on standard classroom bulletin boards of 7 feet x 4 feet. So if you have 2 free bulletin boards or a large wall space-great!

But what if you have a smaller space?
Option 1: Scale and print sound wall cards to fit your space. Measure your available space and measure the size of the sound wall cards you wish to use.
Figure out approximately how much space you would need for each (vowel valley and consonants) based on the configuration of a sound wall and the current size of the cards. Here is an example using my sound wall cards.


Divide your available space by the space needed at the current sound wall card size.
Scale the pages to that percentage prior to printing. For example, if your available space for the vowel valley is 42 inches wide, you would do 42 / 75 = .56. Therefore, you would print the cards at 56% or lower.
Option 2: Use a sound wall poster. Print a sound wall at poster size and hang it where it is accessible.

Option 3: Use a digital sound wall. Don’t have the space for a sound wall in your classroom? Project an instructional digital sound wall onto your whiteboard or smartboard during instruction and when students are writing. Give students their own printable versions to use for reference when writing.
This is an example of a digital sound wall that is included in this resource.

Printable sound wall for students to keep at their desks for reference.

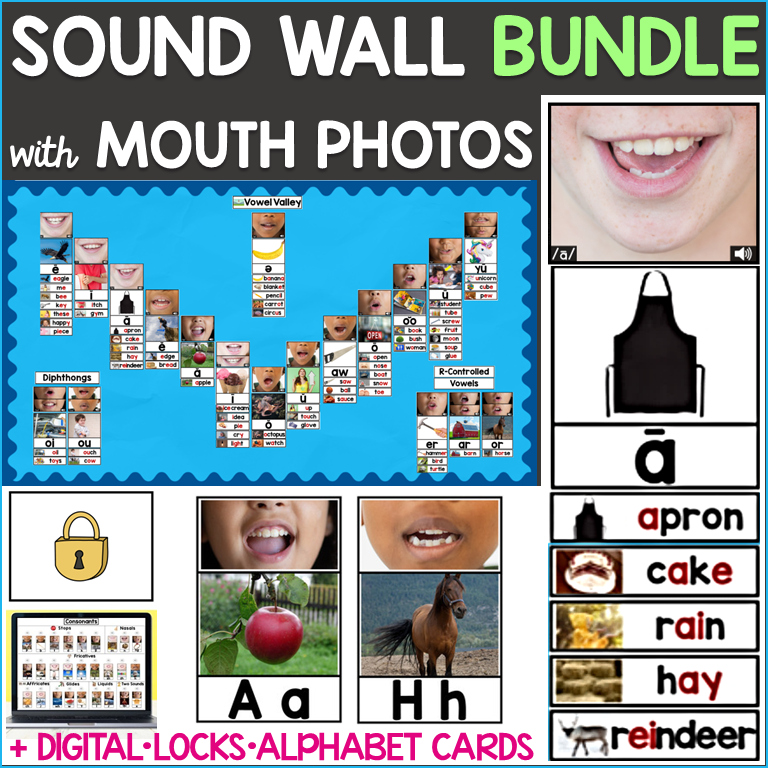
How to Arrange the Vowel Valley
The vowel valley is arranged according to the shape the mouth makes when speaking the sound and where in the mouth the sound is produced. If you watch your chin in a mirror as you say the sounds in the first slope (ē, ĭ, ā, ĕ, ă, ī, ŏ) it will drop and then go back up as you say the vowel sounds in the upward slope (ŭ, aw, ō, oo, ū, yū).
The diphthongs and r-controlled vowels are not part of the valley and should be placed underneath it or to the side of it. This is because your mouth position changes when making the diphthongs and the r changes the sound the vowel makes in r-controlled vowels.
Schwa – The schwa can be placed in the center of the vowel valley since any vowel can be a schwa. After teaching about the schwa sound, it is up to you whether to keep it on the sound wall or not. Since it is not helpful with spelling since any vowel can be a schwa, some teachers choose to remove it after the concept has been taught.

How to Arrange the Consonants
The consonants on a word wall are arranged according to place of articulation (where in the mouth the sound is being produced) and manner of articulation (what is happening with airflow when producing the sound). They are grouped into 7 categories:
Stops – quick puff of air then stops, air stops immediately. Have students place hand in front of mouth when saying the sound to feel the puff of air (p,b,t,d,k,g)
Nasals – air flows through the nose. Have students hold their nose and try to make the sound (they can’t do it). (m,n,ng)
Fricatives – friction in the air flow (f,v,th,th,s,z,sh,zh,h)
Affricates – combination of fricative & stop, friction that is cut off, like a tug of war with sound (ch,j)
Glides – glide into next sound (wh, w, y)
Liquids – air moves around in our mouth like water overflowing (l, r)
Two Sounds – 2 sounds combine (qu, x)

How to Arrange the Sound Wall Cards
The arrangement of a sound wall is very important. It is arranged by sound and the cards should go from sound to print.
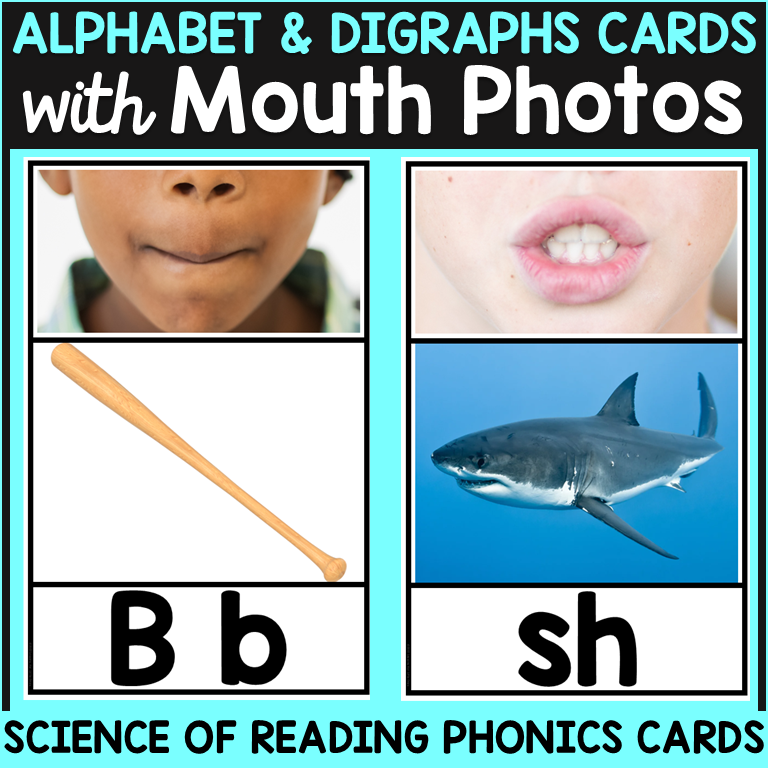
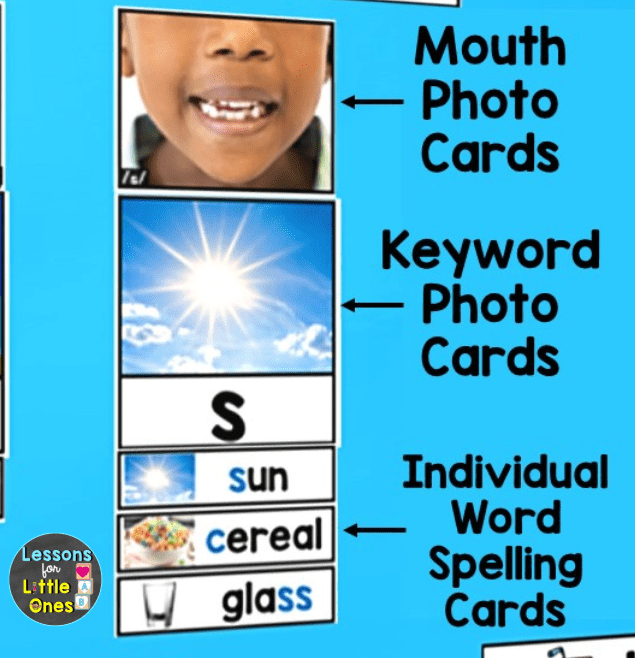
The mouth card should be first so students can see how the sound is made and when searching for a sound on the sound wall they can easily find it by matching how their mouth looks when making the sound.
The keyword picture card should be next. These pictures help remind students of the sound.
The spelling or word cards should be last and only put up or visible after you have taught the spelling. Personally, I use individual word cards with a picture that reminds students of the word and the targeted spelling highlighted in a different color. This shows young students that sounds make up words and where in the word the featured spelling or letter is found (beginning, middle, end).
I prefer to add the word spelling cards one at a time as they are taught so that the wall is not overwhelming for my students and we build the sound wall together.
Using Locks to Cover Sound Wall Cards
Presenting a sound wall with all of the cards visible at once can be overwhelming for young students. Therefore, lock cards can be placed over the cards and taken off as you teach each sound.
It builds excitement for the students (they can’t wait to see what is under each one!) and makes it more interactive and meaningful for them since you are building (revealing) it together.
I like to build even more excitement by having 2 real keys on my desk that we use to “unlock” each sound. Students love it!


I hope this has been helpful in setting up your sound wall. If you are interested in using the sound wall from this post, click the link below. To find helpful tips for how to use your sound wall click here.
Resources used in this post:
Sound Wall with Real Mouth Pictures & Photos + Digital

“This product was perfect. The real mouth pictures were extremely helpful to my students as well as the real life pictures to associate with the letters.” – Kathy S.
“This sound wall product has everything you need to make a classroom soundwall. The REAL photographs are perfect to show the shape of the mouth for each sound. My students love the idea of unlocking the sounds with a real key. That was a great idea!” – Stefanie R.
“My admin bought enough licenses for our PK-3 team to make this our Sound Wall of choice. We love that it is complete, aligned to the Science of Reading, and flexible enough that some minor changes can be made to align with our Dyslexia therapy. Each grade level will only post the sounds that are taught that year. The locks make it easy to put up the entire year of learning and uncover it as the year and teaching progresses. Thank you for a great product!” – Carrie H.
“This is exactly what I wanted for my sound wall. I love the different options of sizes, the colorful real pictures and real mouth pictures. The locks are especially fun and the idea of using a real key is so much fun for kinders. Thank you!” – Melissa H.
“This Is a great product! the pictures are wonderful and I have had fun learning along with my students. This is my first sound wall and everything I needed was here along with an detailed explanation of sound walls.” – Steve K.
Pin it for later!