After visiting the pumpkin farm (one of my favorite field trips!) and bringing back loads of pumpkins, I like to harness my students’ excitement about them by planning lots of fun, engaging pumpkin science activities.
Prior to visiting the pumpkin farm, we learned about the life cycle of a pumpkin with activities, games, & interactive resources and even planted some pumpkins of our own. You can read about it in this blog post.
Now it’s time to explore and experiment with the pumpkins!
If you would like to have the step-by-step directions with photos as well as the recording pages shown for each of these experiments, you can download my Pumpkin Science resource here.
The Parts of a Pumpkin
First we learn the parts of a pumpkin. I use a real pumpkin and start by showing and explaining the outside parts of the pumpkin and their functions (stem, skin, ribs). I like to keep the explanations simple so my young students can understand.
Stem: The stem is what attaches a pumpkin to the vine. It brings water and nutrients to the pumpkin. The stem is green while the pumpkin is still growing. Once the pumpkin is ripe, the stem turns brown or brownish green.
Skin: The shiny, orange outer layer of a pumpkin that protects the insides from insects and disease.
Ribs: Indented ridges running from the top to the bottom. They vary in size – sometimes they are shallow, sometimes they are deep.

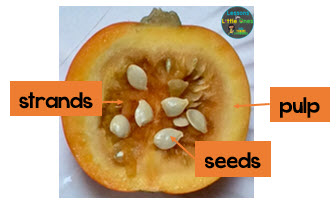
Then I cut the pumpkin half from the top down and we learn about the inside parts (pulp, seeds, strands).
Pulp: The part of the pumpkin with which you cook.
Seeds: The seeds have what is needed to grow new pumpkins (if they are planted). They can also be eaten as a snack.
Strands: The stringy, slimy part of the pumpkin that holds the seeds.
I follow up this activity with several fun labeling activities that allow me to see if my students comprehended and understood the parts of the pumpkin (plus they LOVE to label things!).
Easy Technology Integration with Pic Collage and Seesaw Apps
Since getting iPads I love to integrate technology and show students the different ways it can be used. In this activity we are using it to record and label our observations.
I take a photo of the pumpkin halves and students use Seesaw or Pic Collage to label the parts of the pumpkin. I made a worksheet with a word bank for students who need help with the words. They simply set it as the background in Pic Collage and then upload the photo of the pumpkin and label it using the word bank as a reference.


Parts of a Pumpkin Science Center
This hands-on science center activity allows students to closely explore and investigate the different parts of a pumpkin and then label them.
I cut the pumpkin into the individual parts and place the parts in a sorting tray at the science center along with magnifying glasses and label cards.
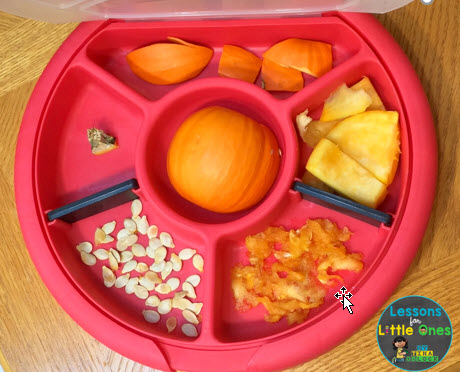
Students use the magnifying glasses to closely examine the parts of the pumpkin and then use the label cards to label them.

The Seesaw app makes it super simple for me to hold students accountable for their center work. Students simply take a photo of the completed center and upload it to their Seesaw journals and I can review them later. They can even use the Record tool to explain what they learned about each pumpkin part.

Parts of a Pumpkin Labeling Pages
Since my students love to label I created these 2 fun parts of a pumpkin labeling pages for them.

Parts of a Pumpkin Craft
I’ve been doing this pumpkin craft for nearly 20 years – the students love doing it and it’s a fun way to review and reinforce the parts of a pumpkin.
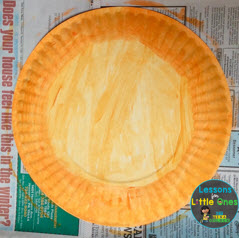
First, students paint the back of a paper plate orange. They paint the inner section of the plate a lighter orange or yellow/orange color to resemble the inside of the pumpkin. The outer part of the plate with the ridges represents the outside of the pumpkin (the skin and ribs).
While the paint is drying, students cut out a stem and cut apart parts of a pumpkin labels.
Once the paper plate is dry, students glue the stem at the top and some seeds and pieces of yarn in the center area to represent the strands and seeds.
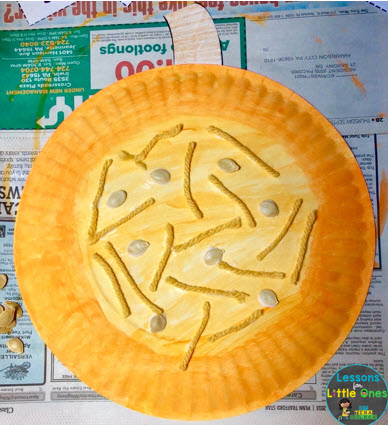
Lastly, students glue the labels in the appropriate places on their pumpkin.

Pumpkin Sink or Float Experiments
I love doing sink or float experiments with pumpkins because my young students are often surprised at the results! Instead of just using one pumpkin, we test 3 different pumpkins:
a large pumpkin
a small pumpkin
a pumpkin with the insides removed
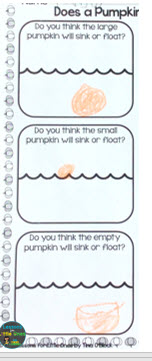
Prior to beginning the experiment, I let the students observe and hold each pumpkin and then draw their predictions for each pumpkin on one half of a recording page. Having them draw the pumpkin either floating on top of the water or sinking to the bottom below the water helps them understand the difference between what it means to sink or float.
We then test each of the pumpkins. Students are often very surprised that the large pumpkin floats too!

As we test each pumpkin, students draw the results on the right side of their pages.

Afterwards we discuss the results and I explain that pumpkins float even though they are large because they are not very dense. They are mostly hollow inside and there is enough air trapped in the center of a pumpkin to make it less dense than water and float.
Pumpkin Investigations
This is a fun activity that allows students to make hypotheses about various attributes of a pumpkin and then test to see if they are correct.
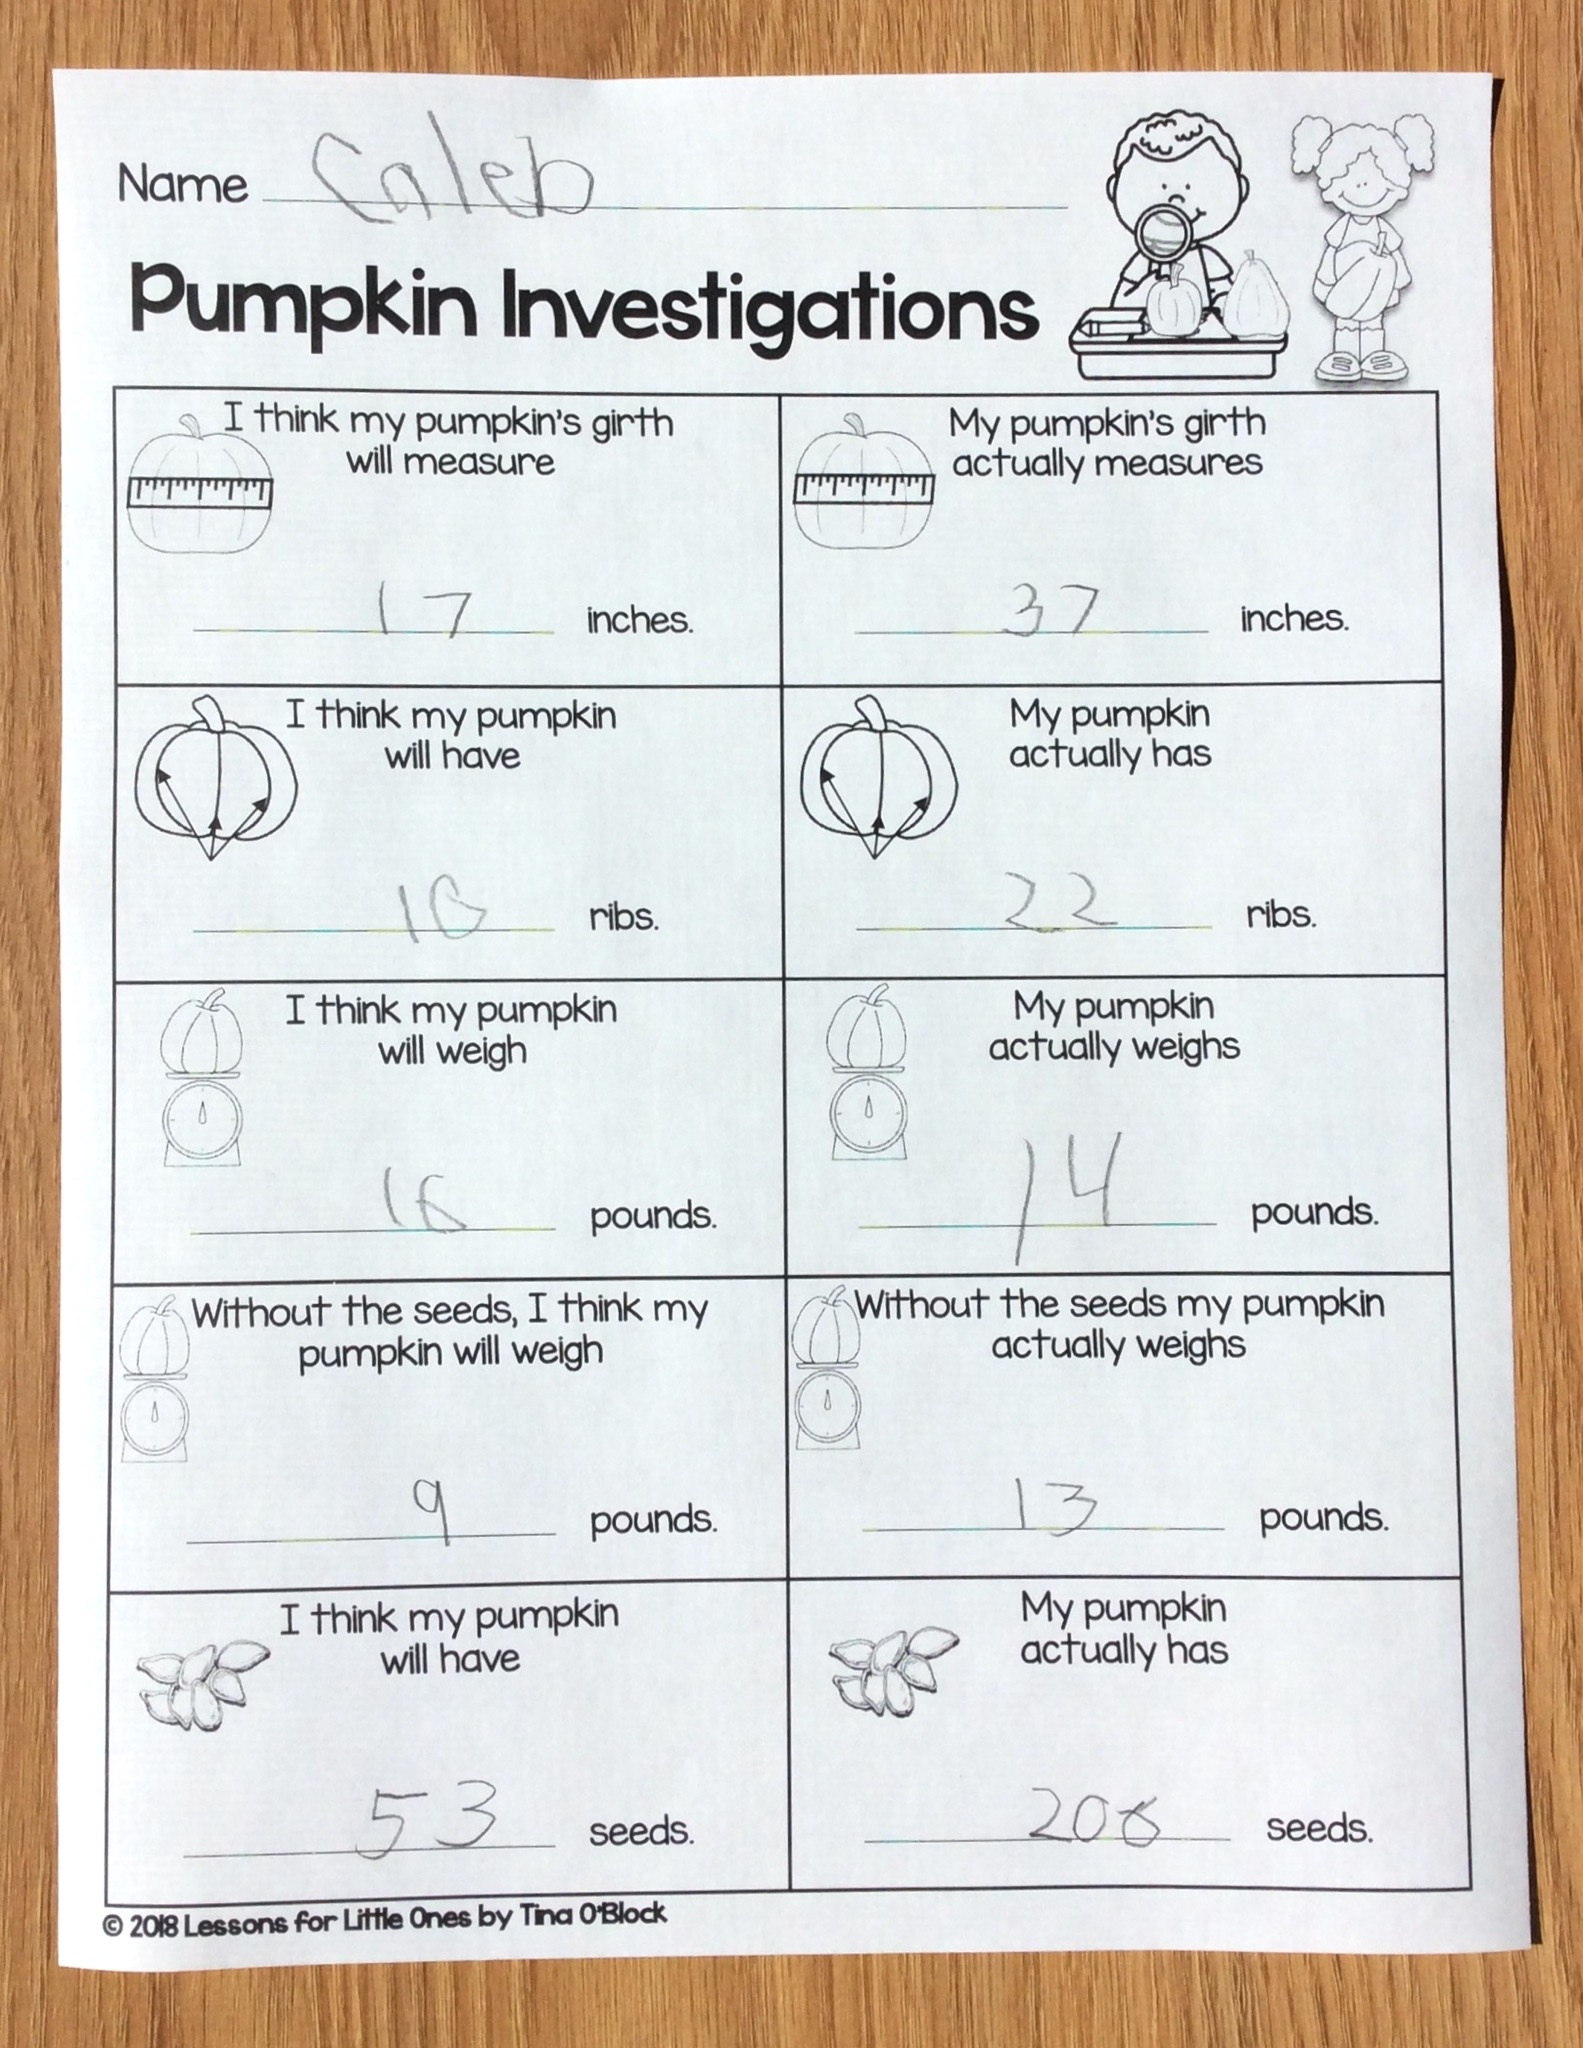
I like to give them “official” Pumpkin Investigation pages on which to record their predictions and results. It makes them feel like little scientists! They have pictures to help guide them along. They record their predictions on the left hand side and the actual results of the investigation on the right hand side.
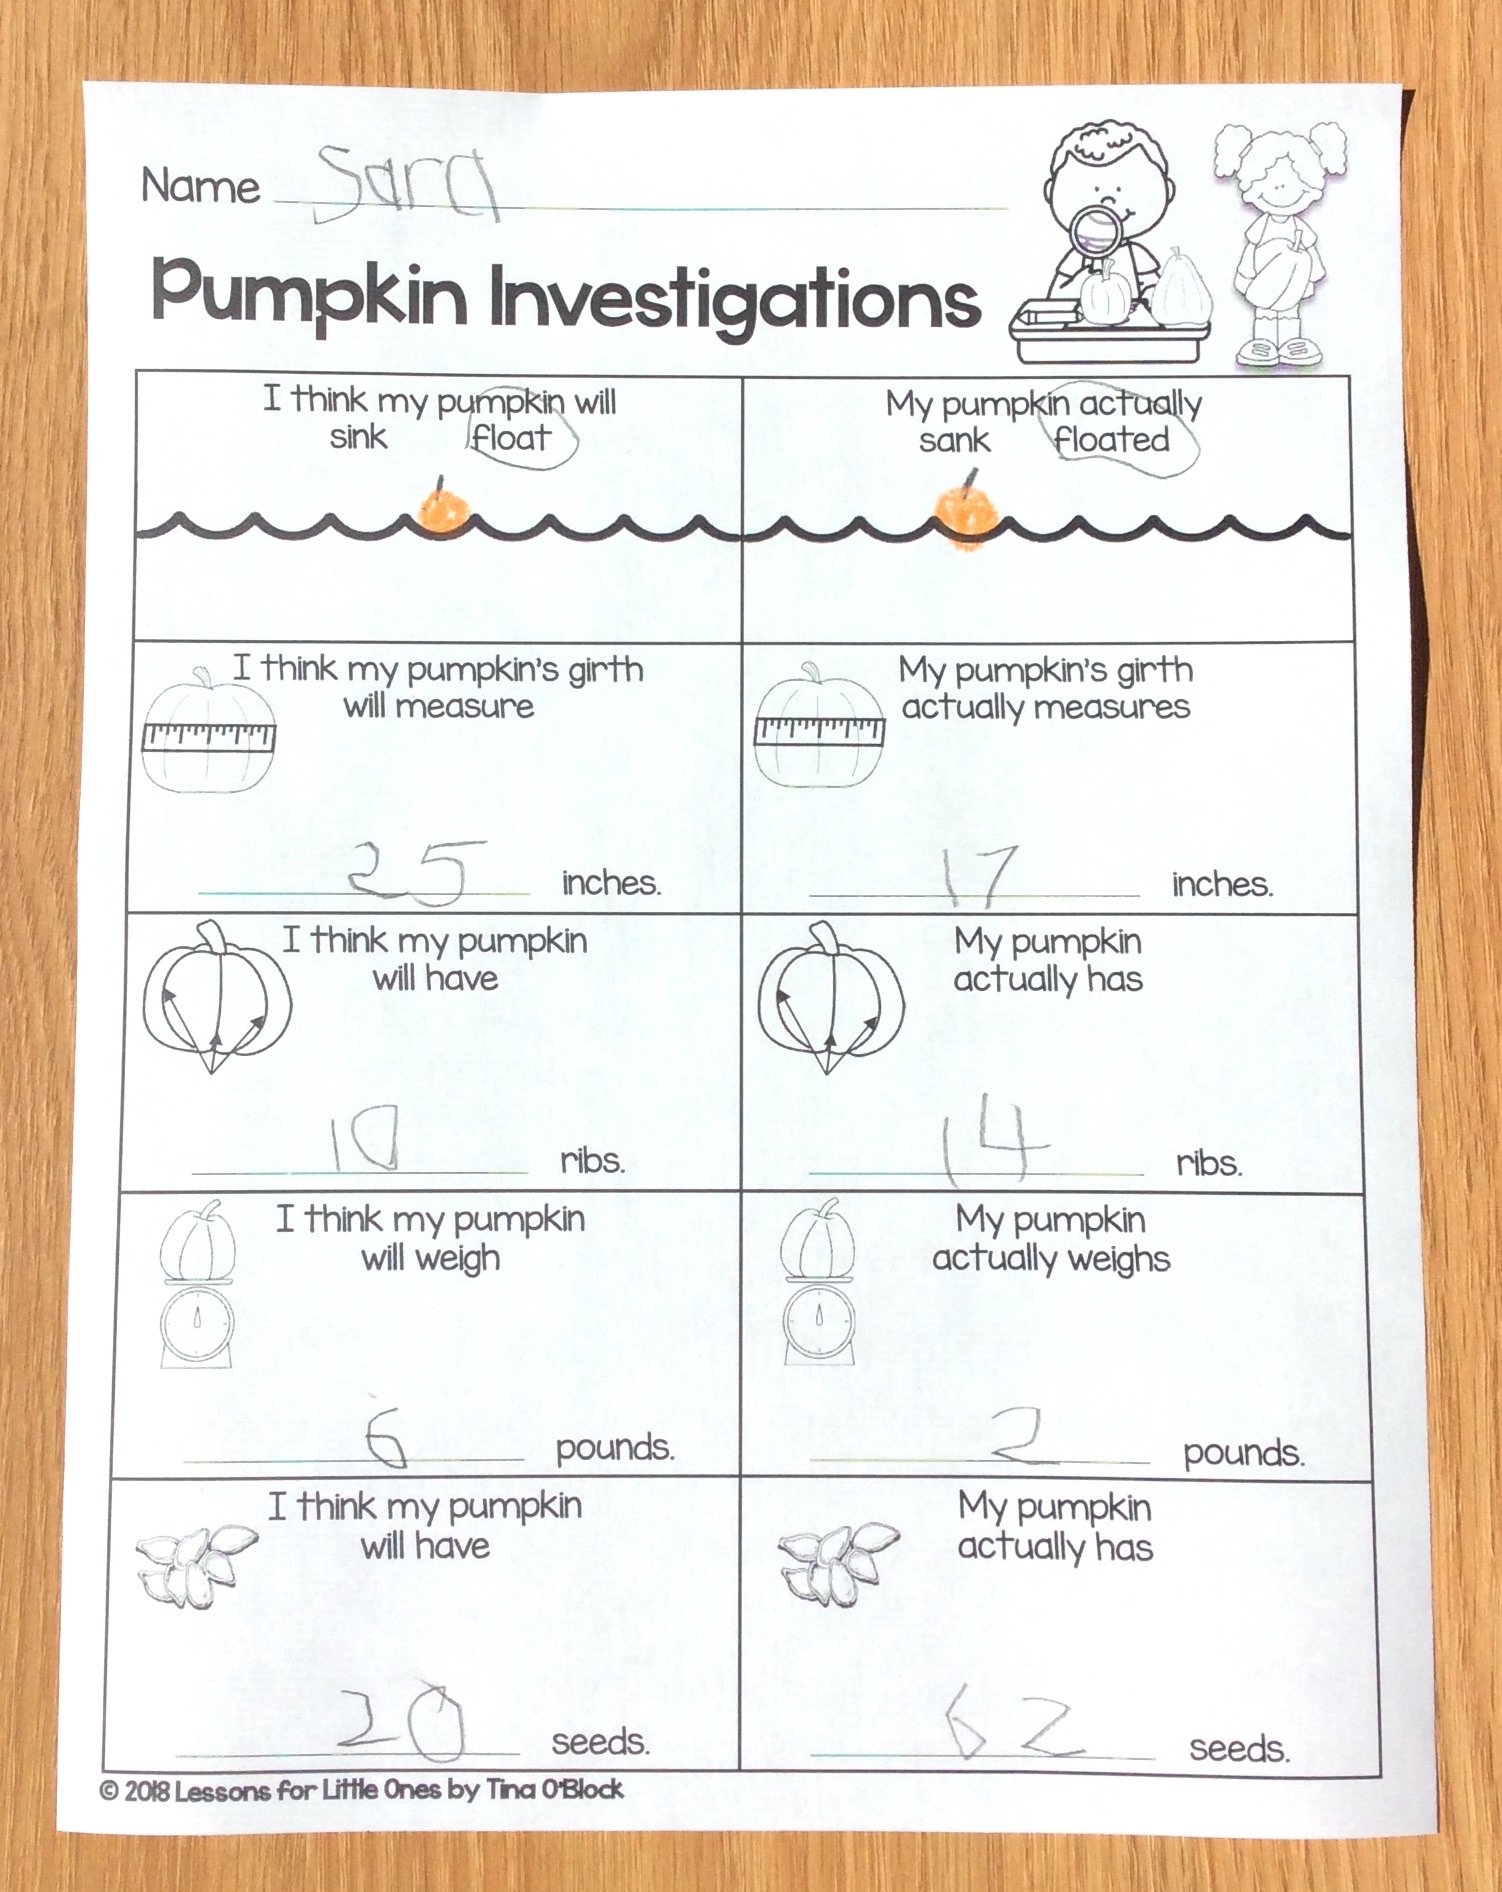
There are a number of different pumpkin attributes that students can investigate.
Pumpkin Girth
Explain to students that a pumpkin’s girth is the measurement around the middle of the pumpkin.
Use a measuring tape to measure around the middle of the pumpkin.

Pumpkin Ribs
Count the number of ribs (indented ridges running from the top to the bottom) on the pumpkin.

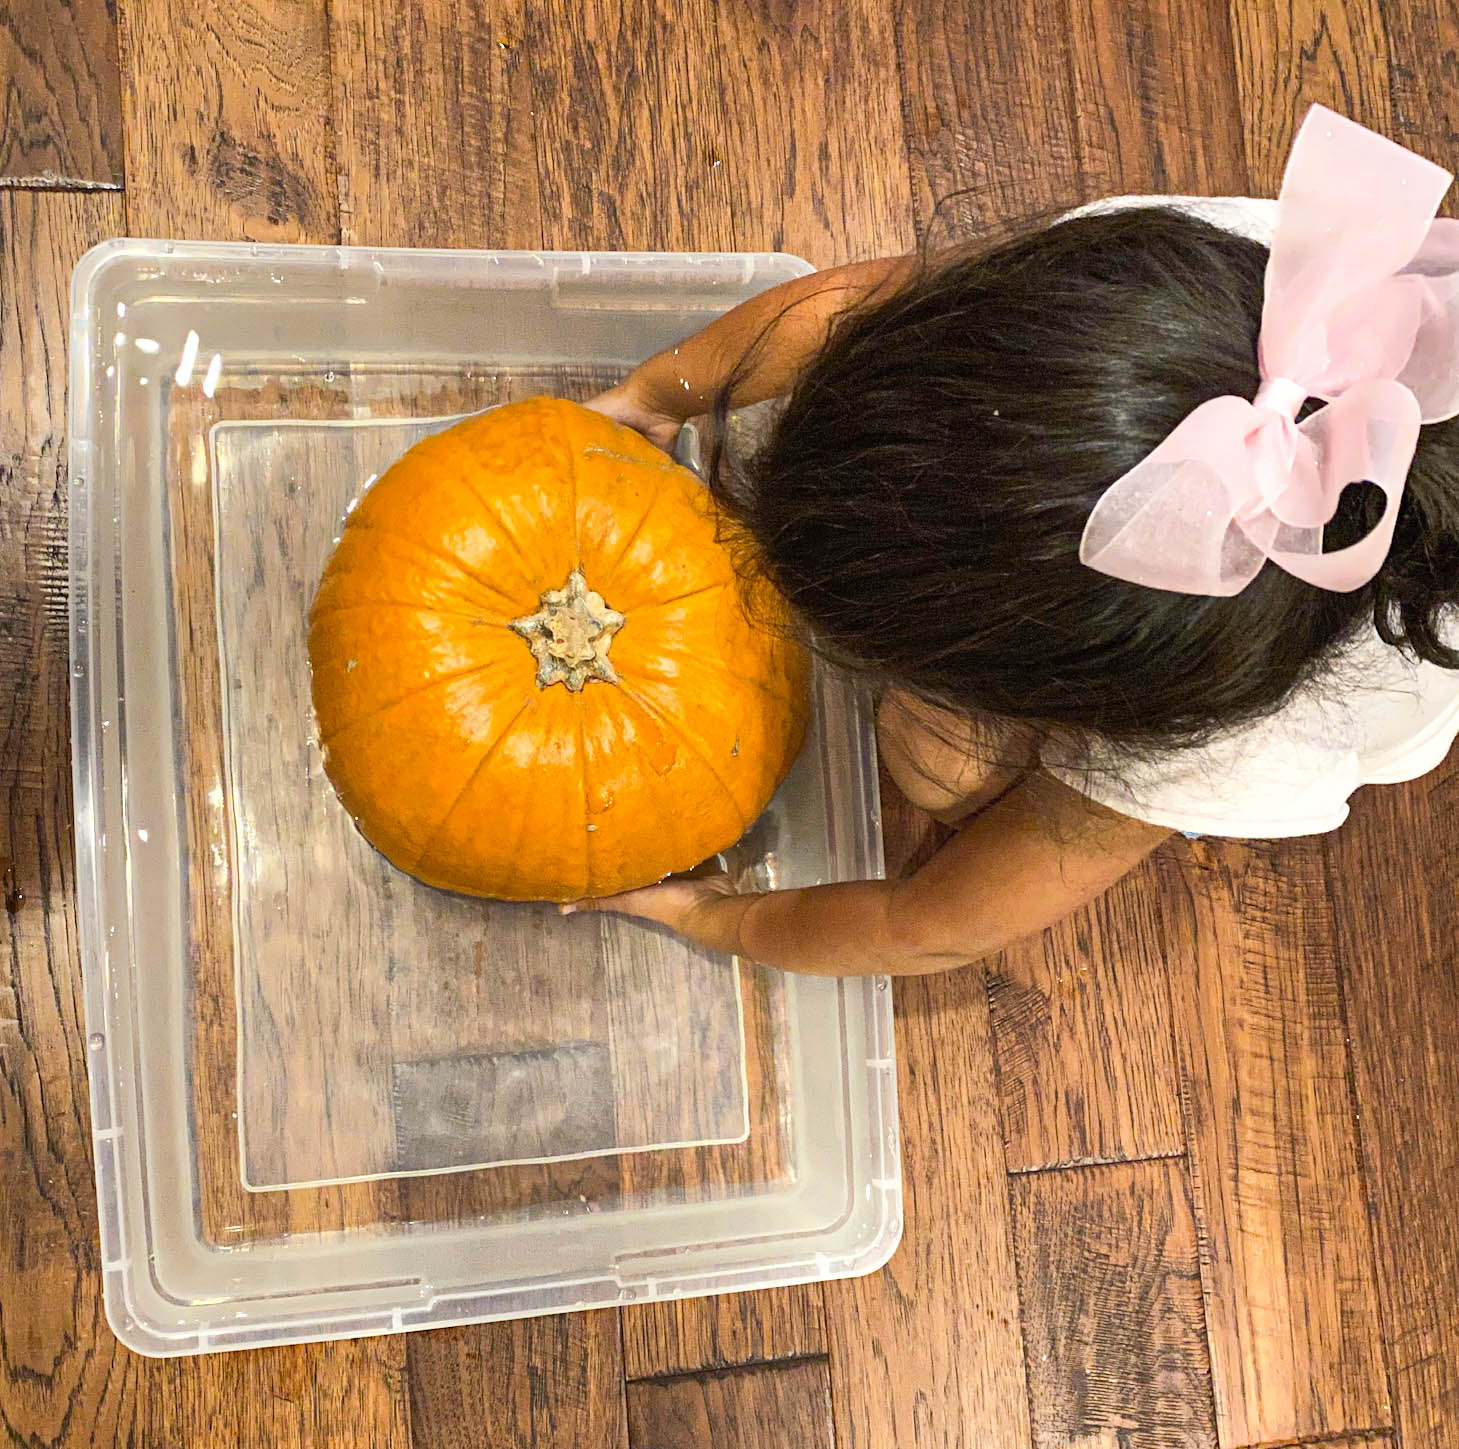
Sink or Float
Place the pumpkin in a tub of water that is deep enough for it to float without touching the bottom.
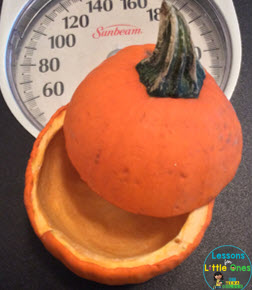
Pumpkin Weight (With and Without Seeds)
Weigh the pumpkin and then cut it open, clean out the seeds and strands, and weigh it again to see the difference.

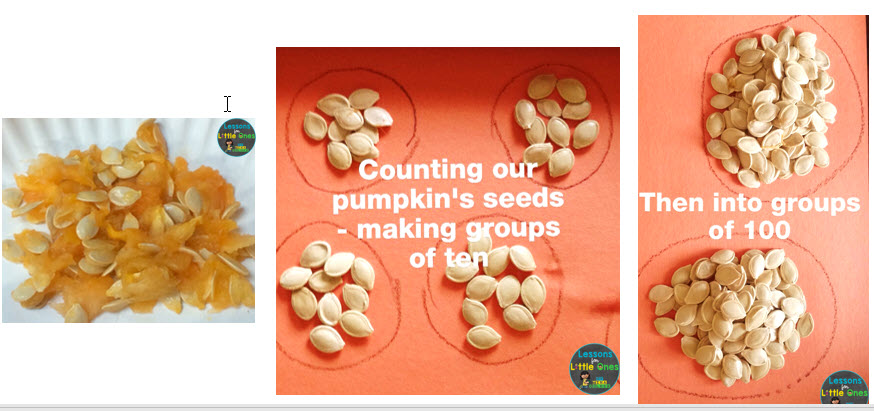
Count the Pumpkin’s Seeds
Cut open the pumpkin, separate the seeds from the strands, and count the seeds. To make it easier for my younger students, I have them put the seeds in groups of 10 and then, if necessary, make groups of 100.
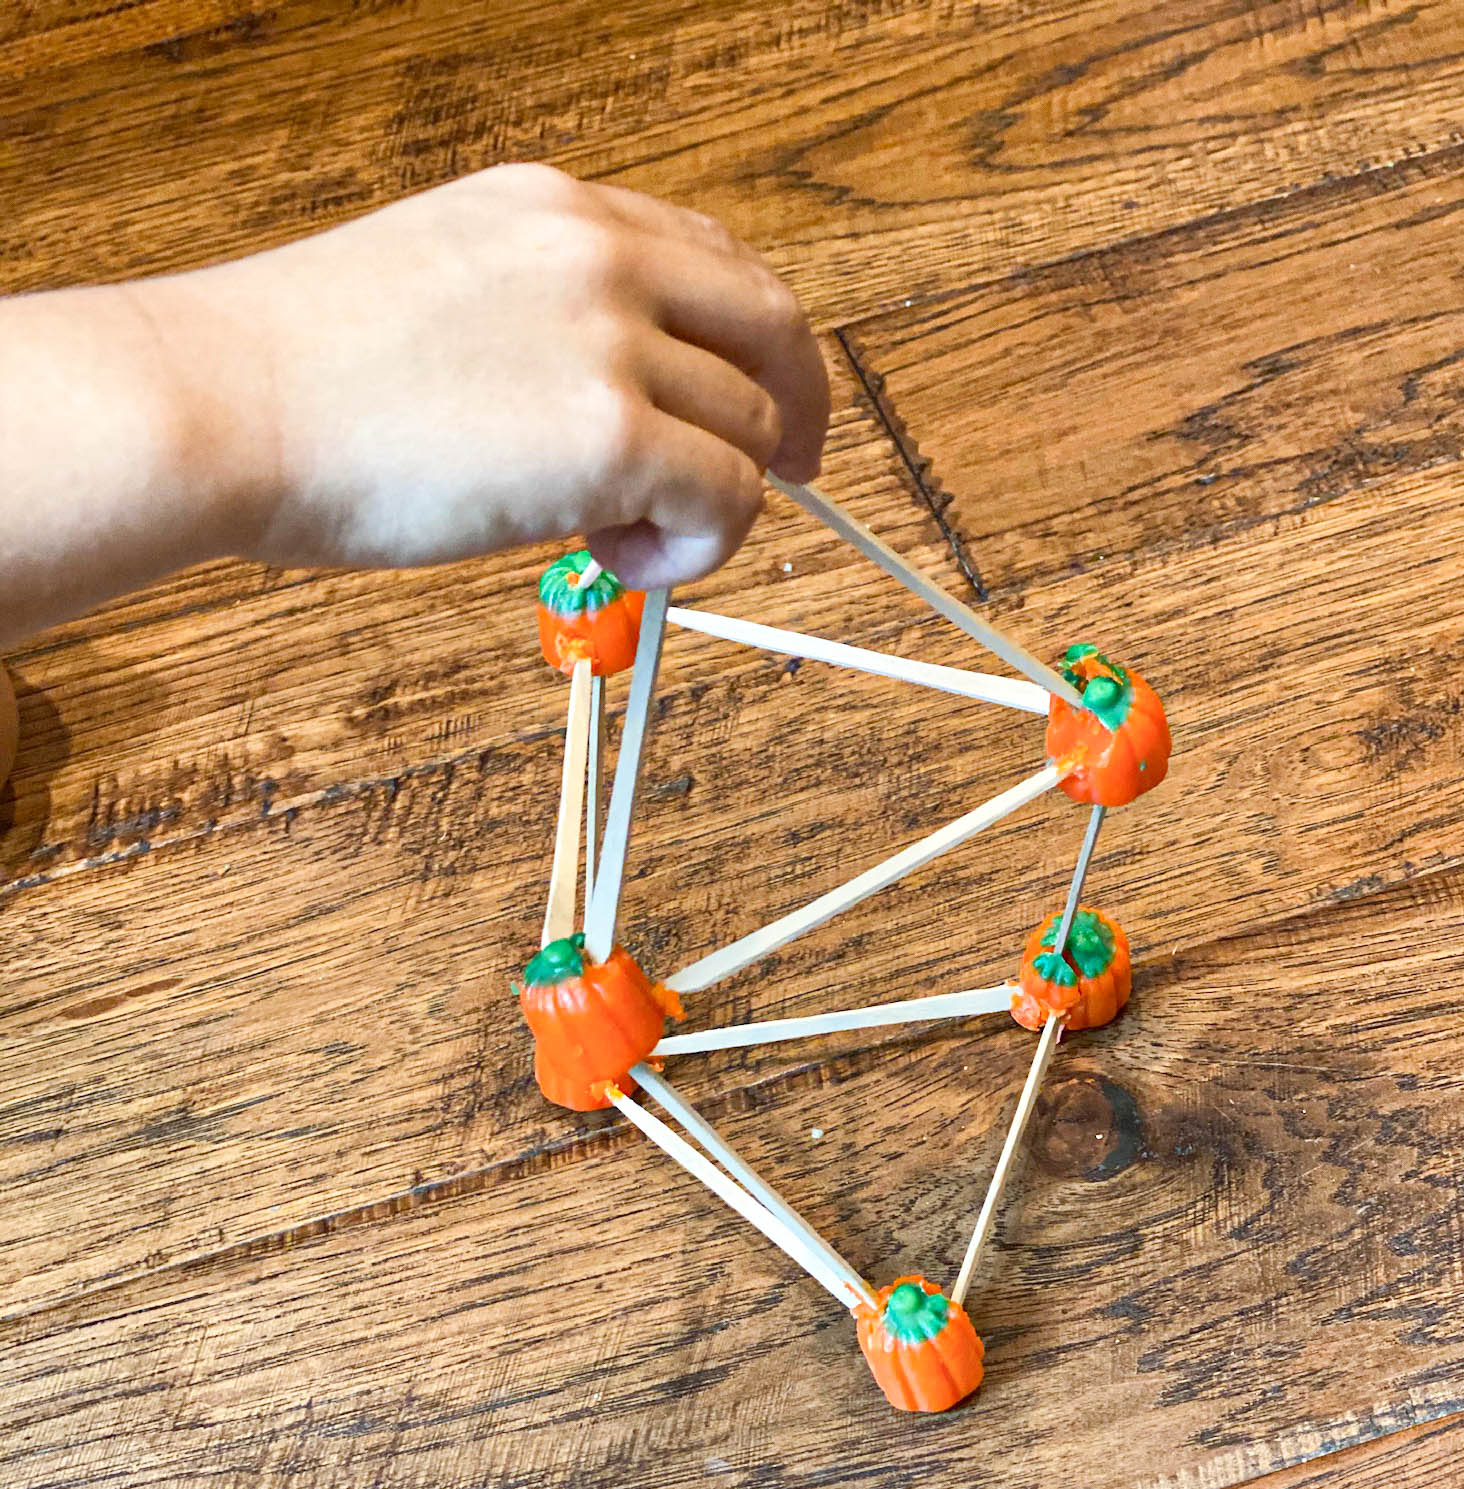
Pumpkin Tower STEM Challenge
The challenge is for students to build the tallest freestanding structure using candy pumpkins and toothpicks within the given time period.
Candy pumpkins (I’ve found that the softer Jelly Pumpkins are a little easier for very young students to use).
Students can complete this challenge in pairs, teams, or individually.
The object of the challenge is for each team or student to build the tallest freestanding structure on the surface of a table within the allotted time period of 5 minutes (time can be adjusted).
Rules of the Challenge:
The structure must be constructed using only the candy pumpkins and toothpicks.
The structure must stand unsupported long enough to get an accurate measurement.
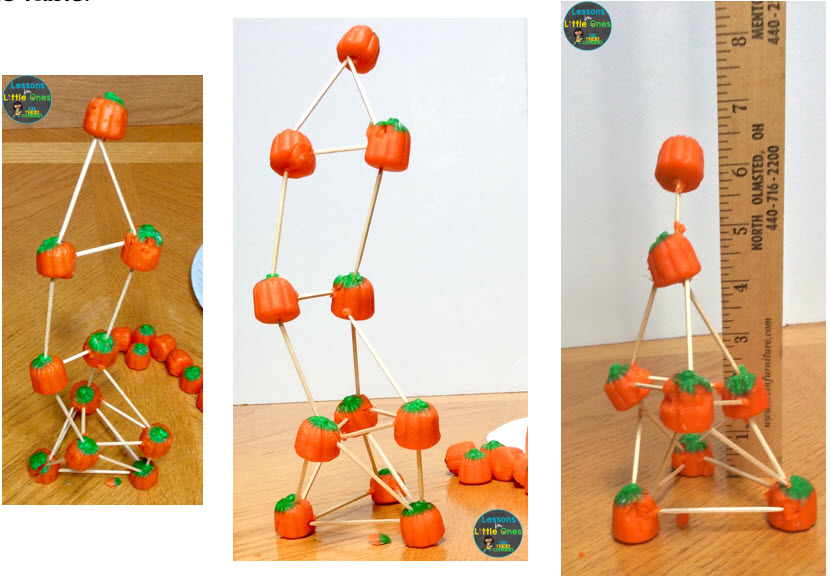
Structures will be measured from the table top to the highest point of the tower.
Give each team or student a pile of candy pumpkins and approximately 50-75 toothpicks.
On your signal students can begin constructing their pumpkin towers.
When time is up, students must step away from their towers. Measure each tower from the table top to the highest point. The winner is the structure that stands the highest vertical point above the table.


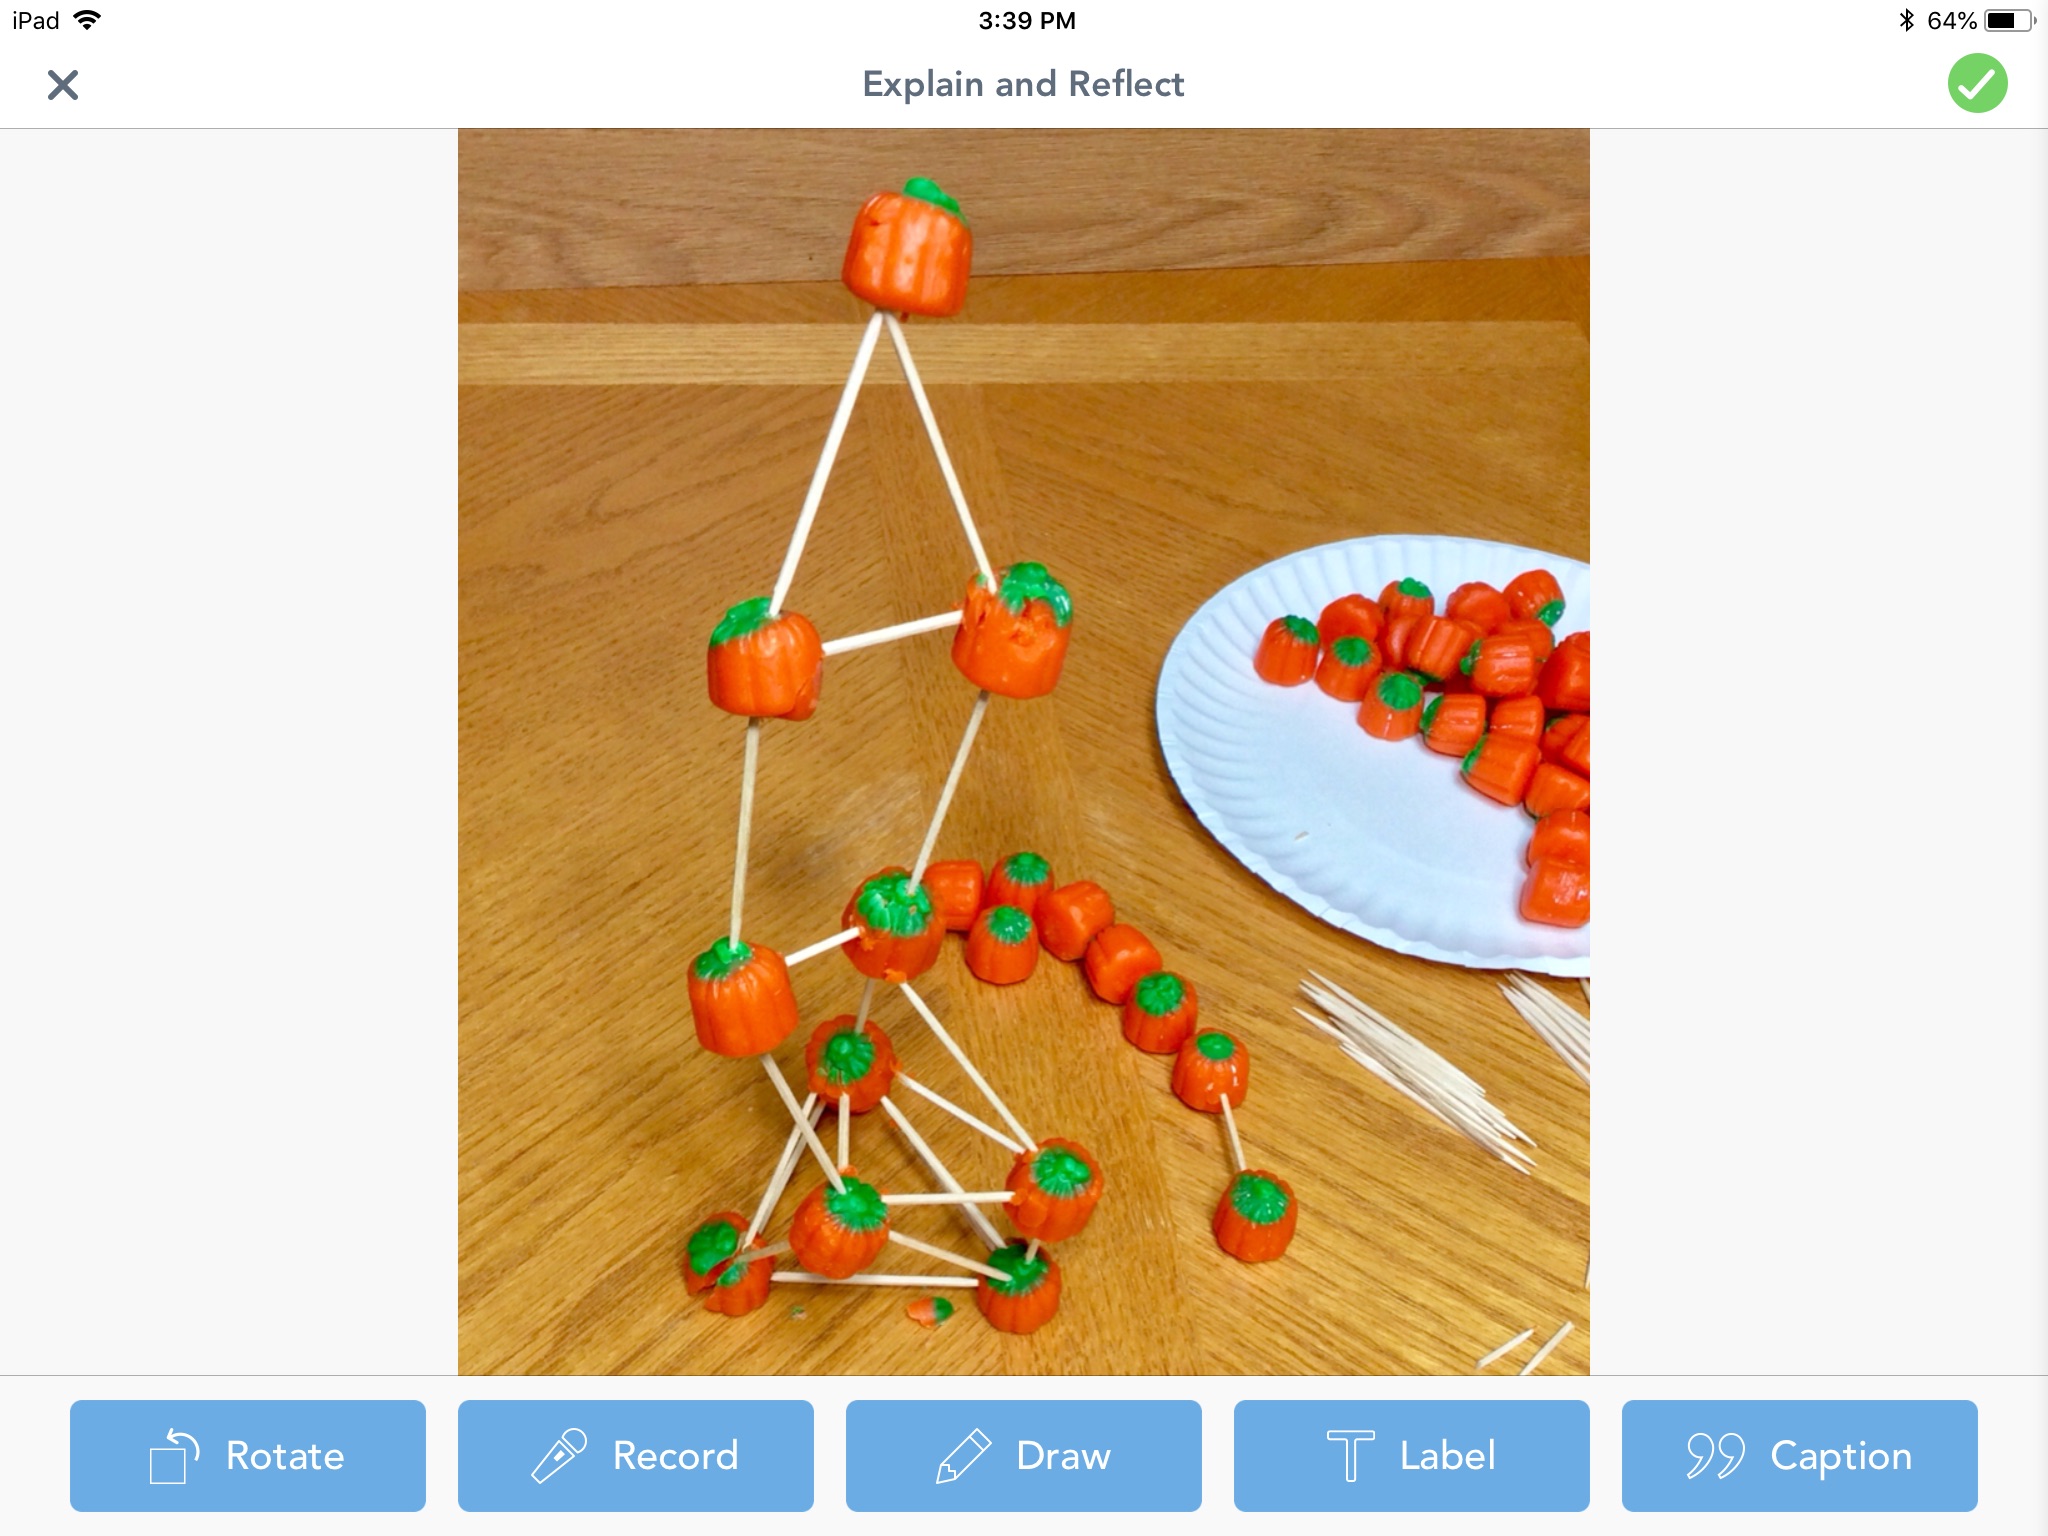
Afterwards I like to have students reflect on what was easy, what was a challenge, and what they learned.
For very young students who can’t write all their thoughts, I have them upload a picture of their pumpkin STEM towers to their Seesaw journals and use the Record tool to tell me what they learned.

5 Little Pumpkins Sitting on a Gate STEM Activity
During October I love teaching my students the “5 Little Pumpkins Sitting on a Gate” poem/song and it quickly becomes a student favorite every year!
If you are not familiar with the poem, here it is. You can also watch a video of the song on YouTube here.
Five little pumpkins sitting on a gate
The first one said, “Oh, my it’s getting late”
The second one said, “There are witches in the air”
The third one said, “But we don’t care”
The fourth one said, “Let’s run and run and run”
The fifth one said, “We’re ready for some fun”
Then “Ooh” went the wind and out went the lights
And the five little pumpkins rolled out of sight
Since students enjoy this poem so much, I recently started doing a fun STEM activity for it.
In this STEM activity, students design and build a gate that will hold 5 little pumpkins (pumpkin candies).
Students can complete this challenge in pairs, teams, or individually.
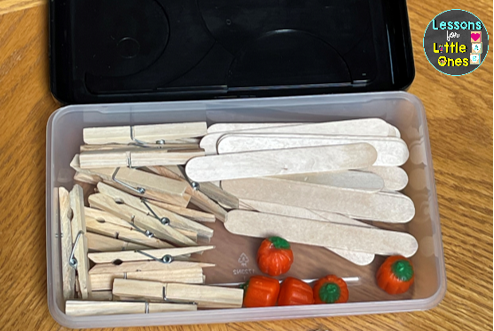
Provide each student or team with building materials and 5 candy pumpkins. I have used wooden clip clothespins, popsicle sticks, and toilet paper rolls. You can use any available materials you wish such as wooden blocks, Legos, etc.
On your signal, students can begin to build their gates.
It’s a good idea to display the time left or make periodic announcements to let students know how much time is remaining in the challenge.
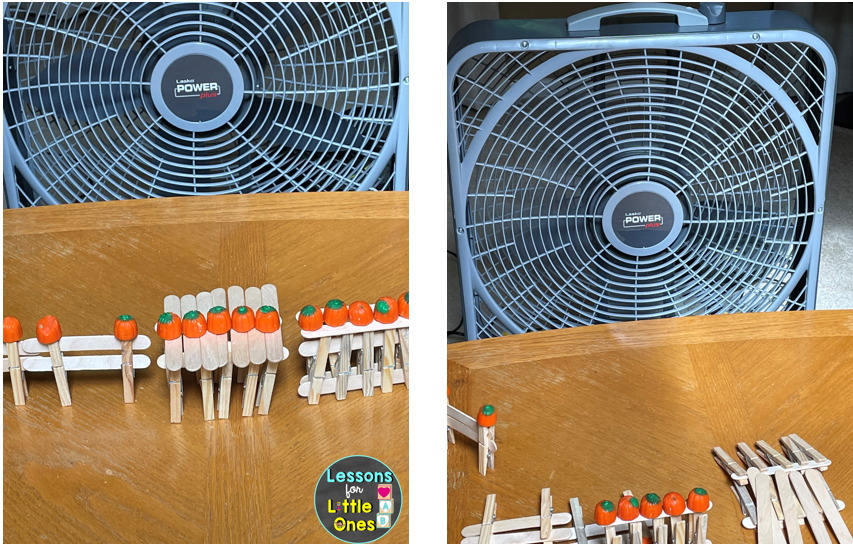
Here are some examples of gates students have built using wooden clip clothespins and popsicle sticks.


I have also done the challenge with toilet paper rolls, clothespins, and popsicle sticks.


Optional added challenge: A fun added challenge to do with your students is to see if their gates holding the 5 pumpkins will withstand wind (since wind is mentioned in the poem/song).
After students have completed their gates, place them in front of a fan. Turn on the fan at various speeds, starting with the lowest, and see which gates and pumpkins withstand the wind the longest.
Afterwards I like to have students reflect on what was easy and what was a challenge.
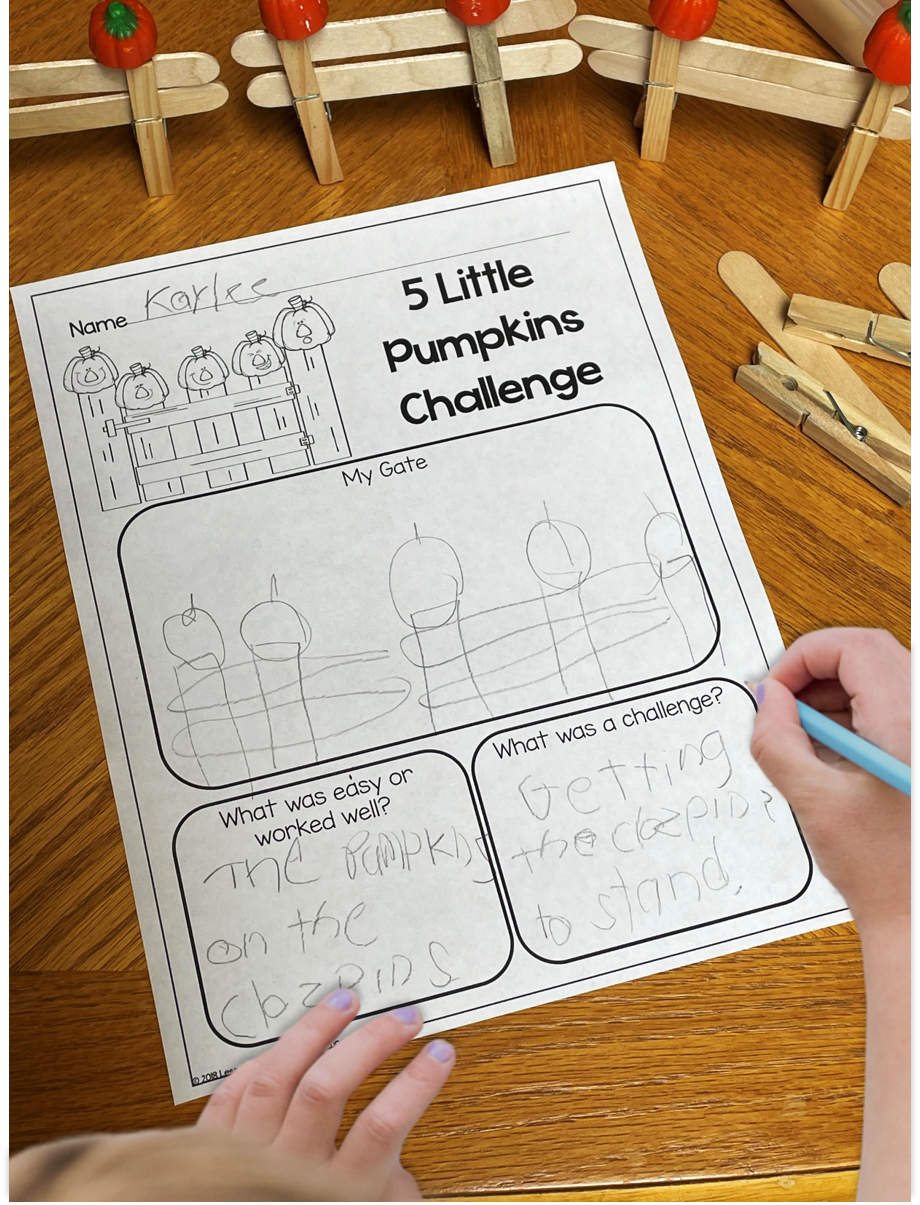
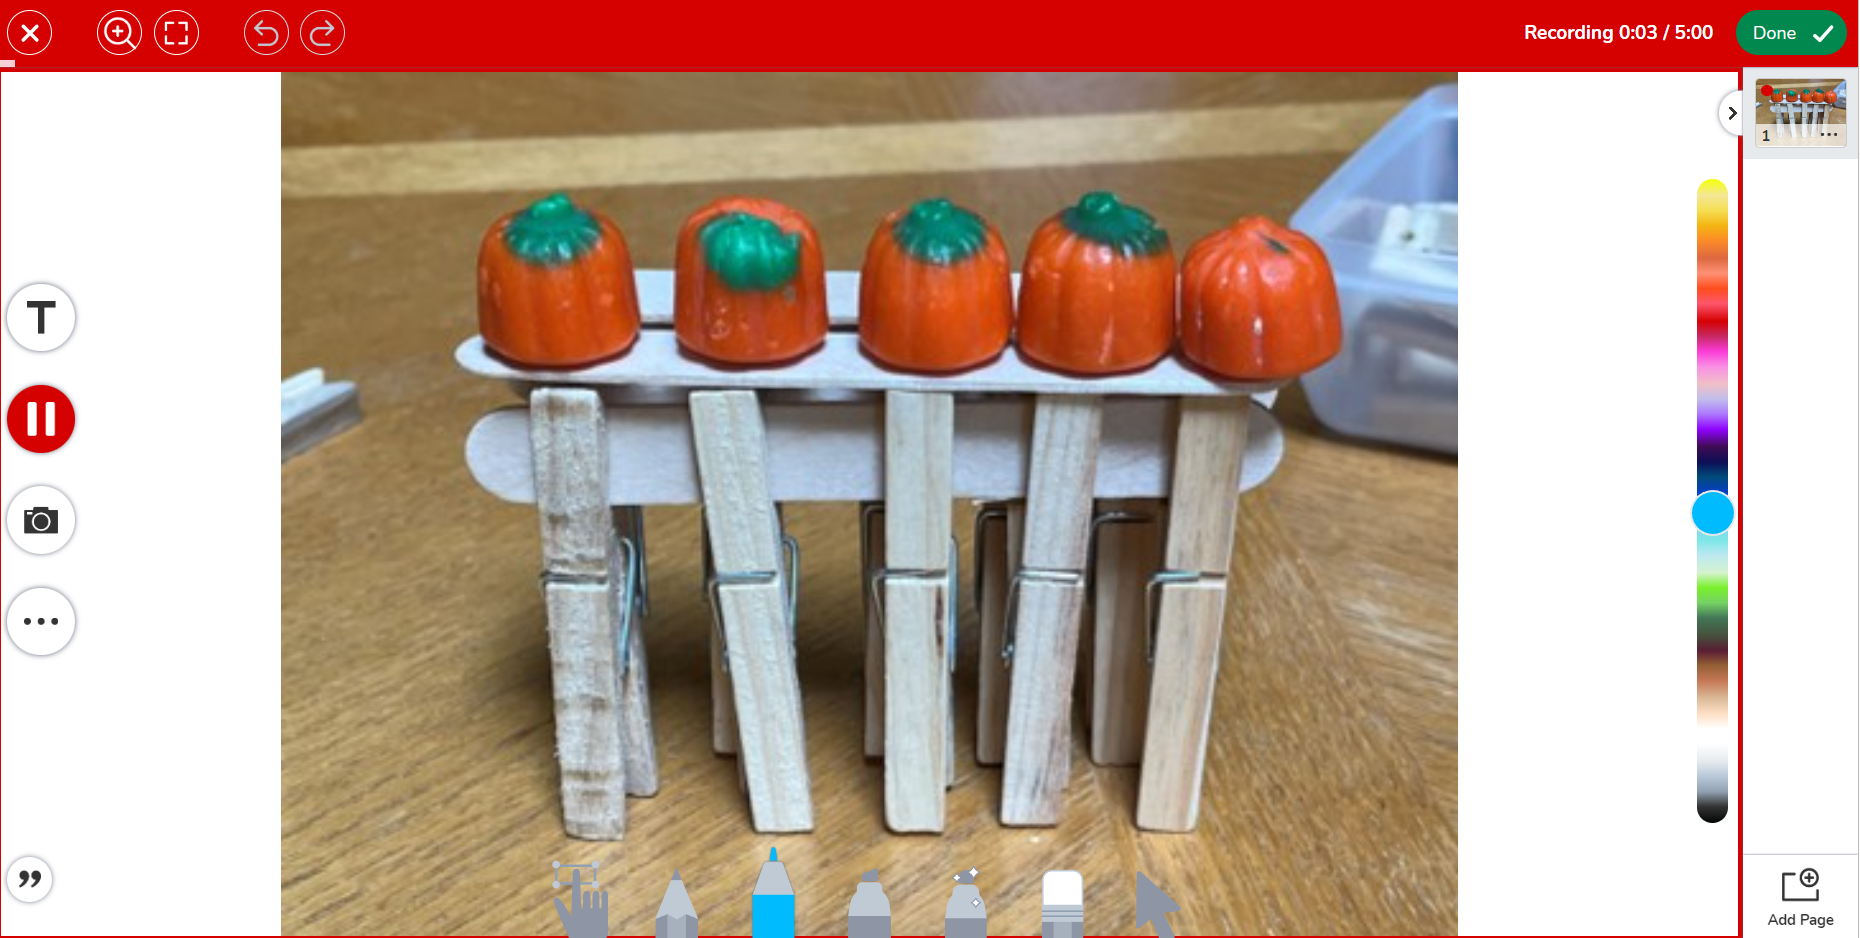
For very young students who can’t write all their thoughts, I have them upload a picture of their pumpkin gates to their Seesaw journals and use the Record tool to tell me what was easy and what was a challenge.
What Dissolves Candy Pumpkins?
Please note that the liquids used for testing can be modified (warm or hot water works best so I advise that be used). These were the ones we had on hand and the students wanted to test: water, oil, pop (soda), vinegar, corn syrup.
Fill each jar or class with the same amount of each liquid. We used 1/2 cup which was more than enough. Label each.

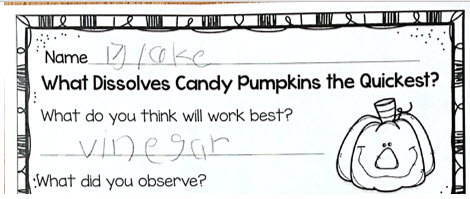
Have students predict which liquid they think will dissolve the candy pumpkins the quickest. I have them write it on a recording page.
Drop a candy pumpkin in each glass at the same time.
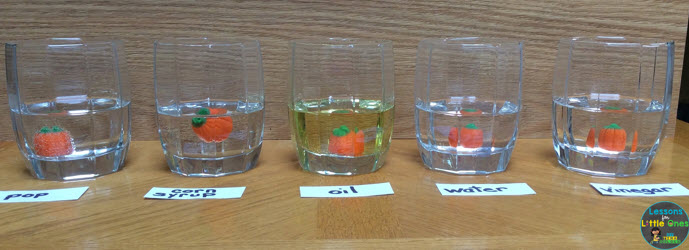
Observe the jars/glasses. You should observe that the candy pumpkin begins to dissolve in the warm water fairly quickly followed by the vinegar. It was bubbling in the pop (soda) but not dissolving quite as quickly as it was in the water and vinegar. It didn’t seem to do much at all in the oil or corn syrup.
You can either wait to see which liquid completely dissolves the candy pumpkin first or take out the pieces after a while to more closely observe the results (this is what I did to make it easier for students to observe and record the results).

I have students draw the results of the experiment and record which solution worked best. Since getting iPads, we have completed the recording page in Pic Collage which allows students to upload actual photos of the experiment.

Pumpkin Density Experiment
This is a very cool experiment that helps students learn about the density of different parts of a pumpkin by creating and using a density jar.
To make the density jar, first add food coloring to the corn syrup (any color can be used). This helps to differentiate it from the water.
You will need equal amounts of corn syrup, water, and oil to fill your jar (1/3 full of corn syrup, 1/3 full of water, 1/3 full of oil).
Put the colored corn syrup in the jar first. Then slowly add the water by pouring it down the side of the jar so it slowly dribbles into the jar and settles on top of the corn syrup. If you dump the water in or add it too quickly they will mix together and the experiment will not work. Do the same with the oil. It should look like 3 layers of liquids.
Use a spoon to push each part of the pumpkin to the bottom of the density jar.
Watch the pumpkin parts rise according to their density.
In our experiment, the piece of pumpkin pulp was the most dense and stayed down at the corn syrup level. The pumpkin strands went up to the water level. A few pumpkin seeds went up in the oil and others kind of floated between the water and the oil. The stem was the least dense and floated to the top of the oil.

I like to have students predict which pumpkin part they think will be the most dense, draw the results, and write what they learned or observed. Since getting iPads, we complete it in Pic Collage which enabled us to use an actual photo of the density jar.

Pumpkin Boats STEM Challenge
Since students loved creating apple boats I decided to do a similar activity with small pumpkins. I wanted to see if they could remember and transfer what they learned from the apple STEM challenge to this one and also see how the pumpkin boats differed from the apple boats.
To prepare this activity, I made a variety of pumpkin boats from which students could choose. I cut some pumpkins in half across the center and some in half from top to bottom. I scooped out the insides of some of the pumpkin halves and left some with the seeds and insides intact.
Students first decided what type of boat and what type of sail they wanted to make. I had them design it first on paper.

After drawing and designing their sails and deciding what type of pumpkin to use for their boat’s bottom, students began to build their pumpkin boats.
Students cut out and designed their sails from construction paper and drew their design and name on them.
Students used a toothpick to attach their sail to the pumpkin bottom of their choice to create their pumpkin boat.

Next they got to set sail and test their boats in tubs of water!

Afterwards I like to have students draw their boats in the water and write whether they floated and what they learned from completing the challenge.

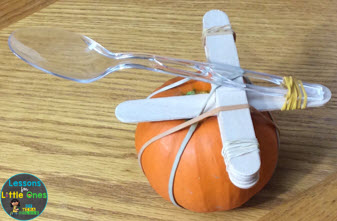
Pumpkin Catapults
In this activity students design and build pumpkin catapults and then test them with various objects. Since we had a lot of small pumpkins from the pumpkin farm, I added an additional challenge by having the students put their pumpkin catapults on a pumpkin! If you do not have pumpkins available, you can have students launch their catapults on the floor or on a table.

Prior to beginning this activity, I explain to students that a catapult is a simple machine that is used to launch an object. Since I teach young students, I show them the basics of making a catapult by first stacking 5 popsicle sticks on top of each other and securing them together with rubber bands on each end.
Then, I stack 2 popsicle sticks on top of each other and place a plastic spoon on top of them and secure them together at the bottom with a rubber band.
Next, I lift up the spoon to form a “V” and place the bundle of 5 popsicle sticks in between the spoon and the 2 sticks to create the catapult.
I then tell students that they can choose how many popsicle sticks to use in each stack and where to place the bundled group (towards the bottom (handle) of the spoon or up near the launch location).

Lastly, I show students how to attach the catapult to the pumpkin using several rubber bands. I explain that they can decide where on the pumpkin to place their catapults.
Then the students design and build their pumpkin catapults. When I did this with my younger pre-k students, they needed help securing the rubber bands so if you teach young ones it may be best to do this activity on a day when you have some parent volunteers.
The objects that students launch in their catapults can vary. Since we did this in the fall, we used candy pumpkins and acorns. You could also use fall colored pom-poms, candy corn, cotton balls.
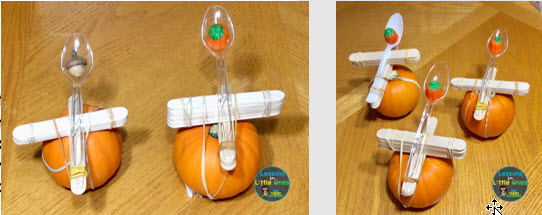
We launched our catapults in an open area of the room and measured the distance the objects flew with measuring tape. You could also set up paper targets, plastic cups in a pyramid, buckets or tubs to check the accuracy of the catapults.
I allowed students to make any changes to their catapults (change the number of popsicle sticks, move the base, change the object launched) in between launches so they could test different theories.


After students were finished launching their catapults, we discussed the results.
What objects flew the farthest?
How did the number of popsicle sticks used affect the results?
How did the placement of the catapult on the pumpkin affect the results?
Does the object land nearer or farther when you push down on the spoon a little compared to when you push down a lot?
How did changing the position of the launching stick affect the results?
We also discussed how catapults work.
Catapults work because of energy being converted from one type to another and transferred from one object to another. When you push down on the spoon to prepare for launch, you add energy to it. This energy is stored in the spoon as elastic stored energy. When you let go of the spoon, this stored energy is released and converted to energy of motion which is transferred to the launch object making it fly through the air.
I had students complete a challenge page where they first designed their catapult, recorded the distances for each object, and wrote what they learned.

If you would like to get more detailed step-by-step instructions, the science recording pages, additional technology integration ideas, and parts of a pumpkin word wall cards (real photographs) CLICK HERE to download my Pumpkin Science & STEM resource.
If you would like both the pumpkin science activities and the pumpkin life cycle activities, printables, and PowerPoint you can get them in my discounted Pumpkin Science Mega Bundle.

Have engaging science experiments and STEM activities throughout the entire school year with this money-saving Science & STEM Bundle!

Pin it for later!