Since young students tend to get extra excited and lose focus in the days preceding a holiday class party, I like incorporating science because it almost instantly gets their attention, and it is hands-on and engaging. They don’t even realize they’re learning most of the time!
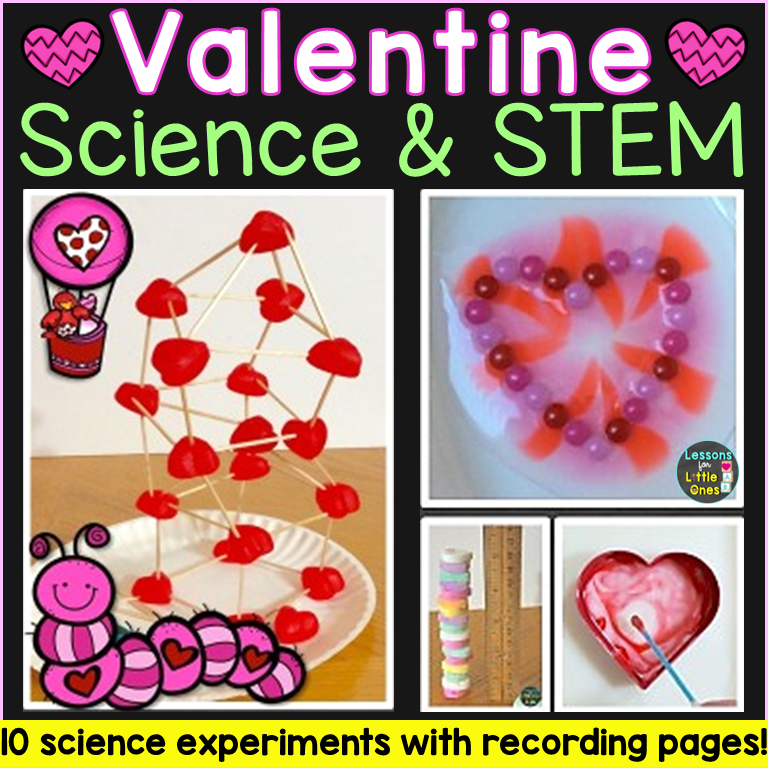
In this post, I’m sharing some favorite Valentine-themed science experiments and STEM activities. Most of these experiments use simple materials you already have and can be set up quickly — perfect for the busy days leading up to Valentine’s Day. These Valentine science and STEM activities are perfect for kindergarten, first grade, and early elementary classrooms.
Want everything ready to go?
If you would like to have the printable recording pages, step-by-step directions with photos, and optional technology integration for every experiment in this post, you can download my Valentine Science & STEM resource here:
👉 Download the Valentine Science Resource
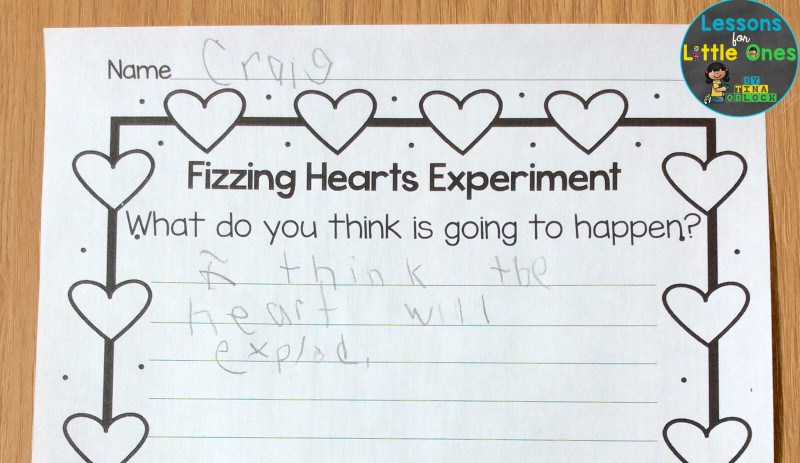
Fizzing Hearts Experiment
This is a fun experiment that teaches students about chemical reactions. No matter how many times we mix vinegar and baking soda together for a variety of activities, the students always love watching it.
This time is especially exciting for students because after watching a demonstration, they get to make their own fizzing hearts.
To conduct the demonstration experiment, you place Valentine heart cookie cutters in a shallow dish or on a baking sheet and fill them almost half full with baking soda.

Then add red food coloring to some vinegar. Have students predict what they think will happen when you add the vinegar to the baking soda in the hearts and record their predictions.
With an eyedropper, add the colored vinegar to the baking soda and observe the reaction. The vinegar (acid) reacts with the baking soda (base) and creates carbon dioxide bubbles. Here are some photos as well as a short YouTube video:


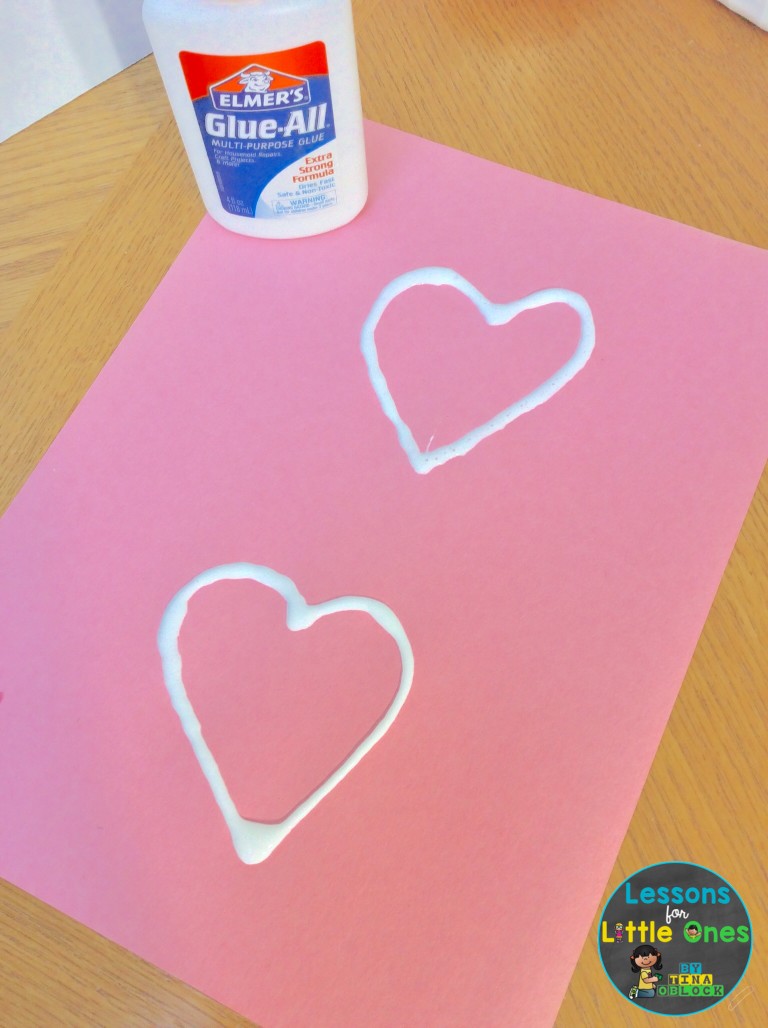
Students can conduct their own experiments using glue and construction paper. Students make hearts with the glue on construction paper and let them dry.
When I did this, I had students record what happened in the demonstration experiment while the glue was drying. I’ve had them draw the reaction on a recording page and use actual photos in Pic Collage.


After the glue has dried, students can add a little baking soda to the hearts and then slowly drop the vinegar onto the baking soda to create their own fizzing hearts.


Students love doing this experiment themselves! Since we now have iPads, I’ve had them app smash by making a collage of experiment photos in Pic Collage and then uploading it to their Seesaw journals. Once in Seesaw, they use the Record tool to tell what they did and what they learned (LOVE this tool!).

Magic Milk Marbled Hearts
Students enjoyed the Christmas magic milk experiment so much (and so did I!) that I wanted to do a version for Valentine’s Day.
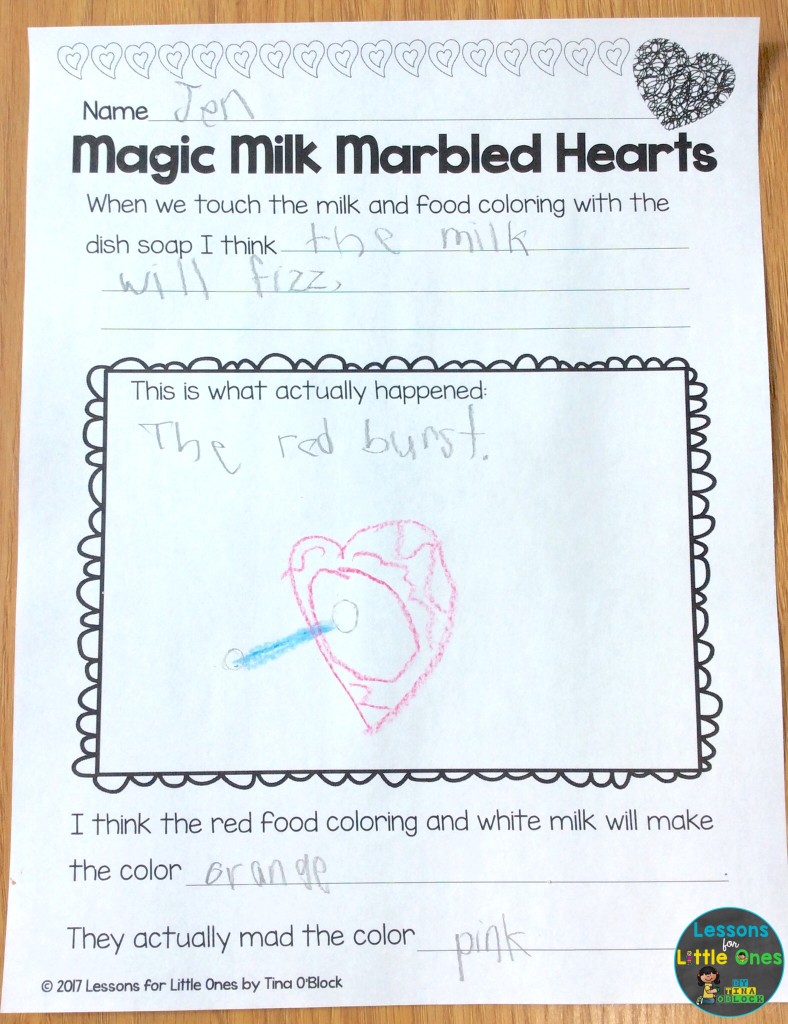
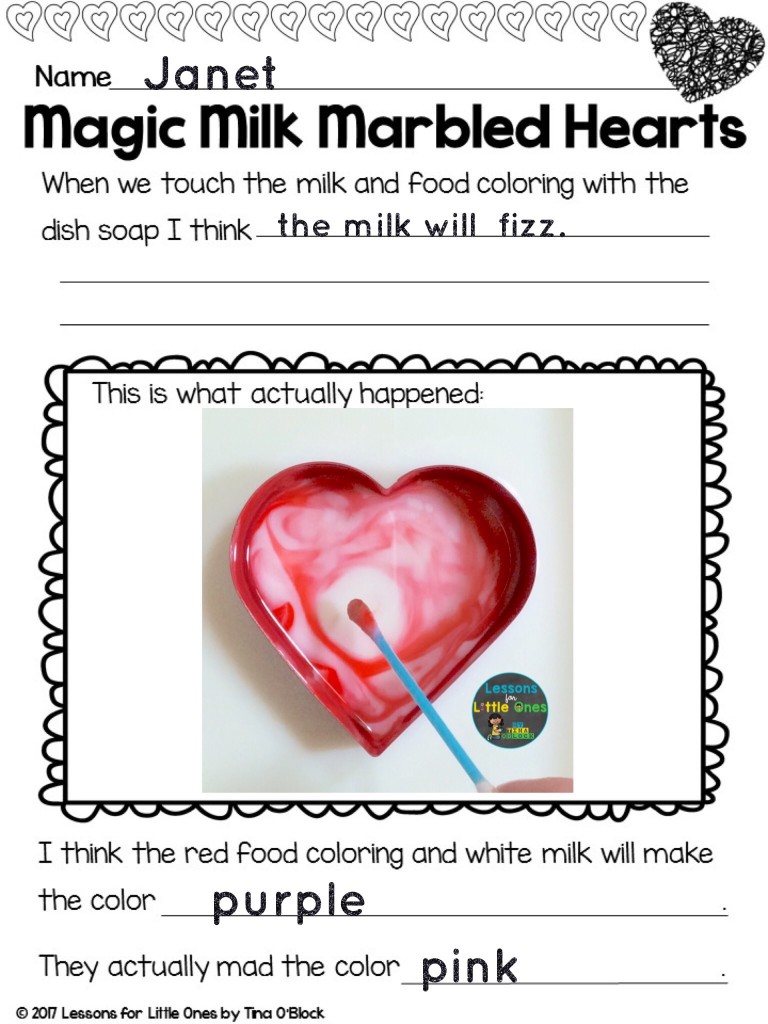
The setup is similar – place a Valentine cookie cutter in a white dish and add enough whole milk to cover the bottom.

Show the students red food coloring and Dawn dish soap. Explain that you are going to drop the food coloring in the milk and then touch it with the Dawn dish soap. Ask them to predict what they think will happen and record it.

Add a few drops of the red food coloring to the milk inside the heart, dip a Q-Tip in the dish soap, and dab it on the food coloring. It makes the food coloring “burst”! Here are a few photos along with a short YouTube video:


Allow students to observe and record their observations.

After the food coloring has been dispersed, it’s time to mix the red food coloring with the white milk and see what happens. Have students predict what color they think adding white to red will create.
Use a dry Q-tip to swirl the colors. This is the fun part! It makes beautiful designs! Eventually, the colors will mix together and form pink.


Sweet Heart Experiment
We love this experiment because the effect it creates looks amazing!
This is another experiment that allows students to test their hypotheses about the effect warm water will have on coated candy.
Place either Valentine M&Ms or Skittles candies in a heart shape in a white dish.

Have students predict what they think will happen to the heart when warm water is added. I gave them choices from which to choose.

Slowly pour warm water down the side of the dish to prevent the candies from moving when they come in contact with the water, and observe the colorful reaction!


Once the warm water hits the candies, it will dissolve the candy coating, causing the colors to mix with the water and make a beautiful design.
Discuss the reaction with students and have them record what happened. Since this experiment creates such a stunning visual display, we use photos in both Pic Collage and Seesaw to document our findings.


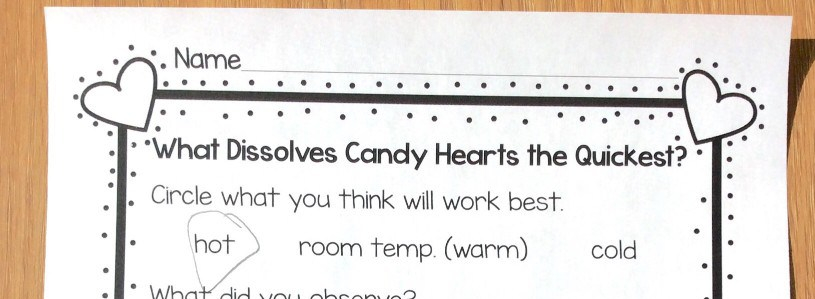
What Dissolves Candy Hearts the Quickest? Science Experiment 1
After students observe the effect warm water has on coated candy, I like to then have them hypothesize and test how different temperatures of water will dissolve candy conversation hearts that do not have a hard candy coating.
They first predict which temperature of water (hot, room temperature, warm, cold) will dissolve the candy hearts the quickest.
I then fill 3 containers with the same amount of hot, warm, and cold water and drop a candy heart in each at the same time.
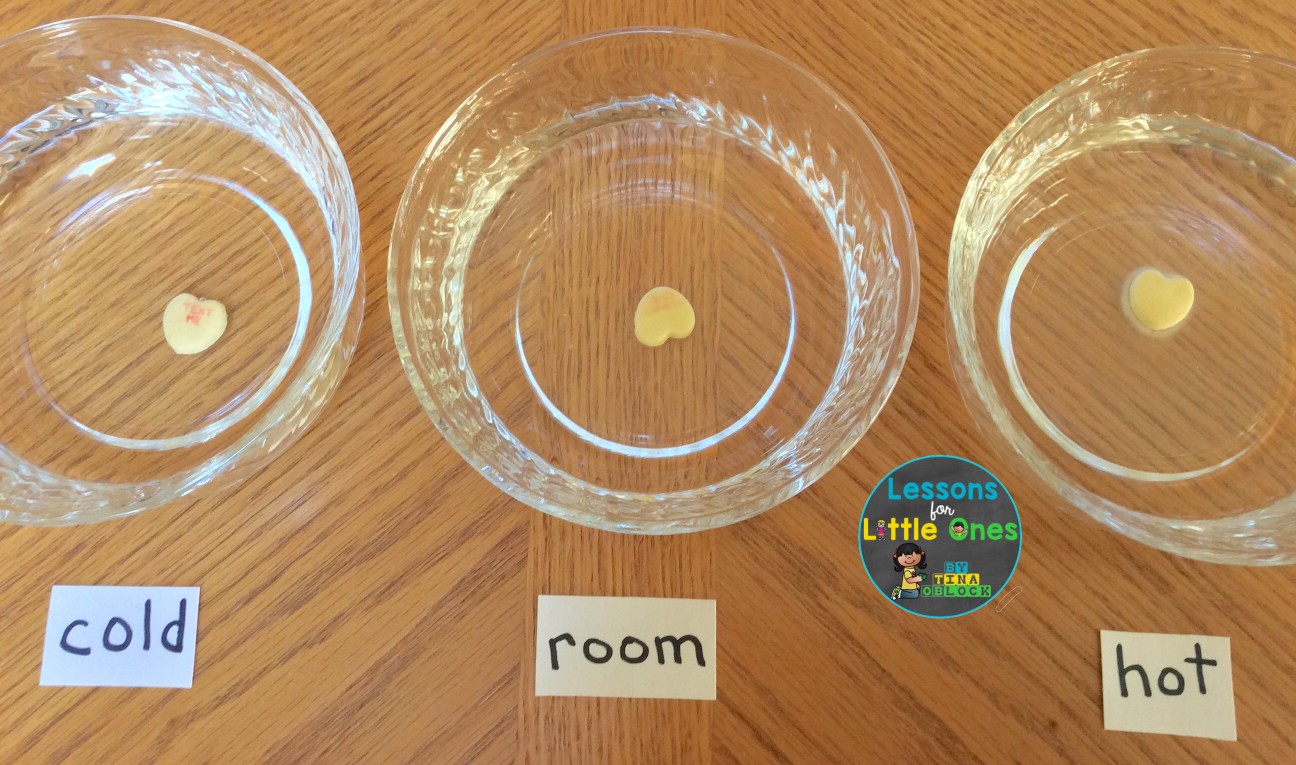
The candy heart in the hot water began to dissolve very quickly. The words on the heart disappeared first, followed by the warm room-temperature water.
We discuss the results, and students learn that water molecules have powerful magnetic properties that break apart the bonds that hold sugar molecules together. They can actually insert themselves between the sugar molecules, which is why the sugar (candy heart) breaks apart. The heat in the hot water makes the molecules move faster, so the water molecules are able to break up the sugar (candy heart) molecules at a faster rate.
Students then record the results on their recording pages and write what worked best on the bottom. Students can either draw the results or use Pic Collage to insert actual photos.


What Dissolves Candy Hearts the Quickest? Science Experiment 2
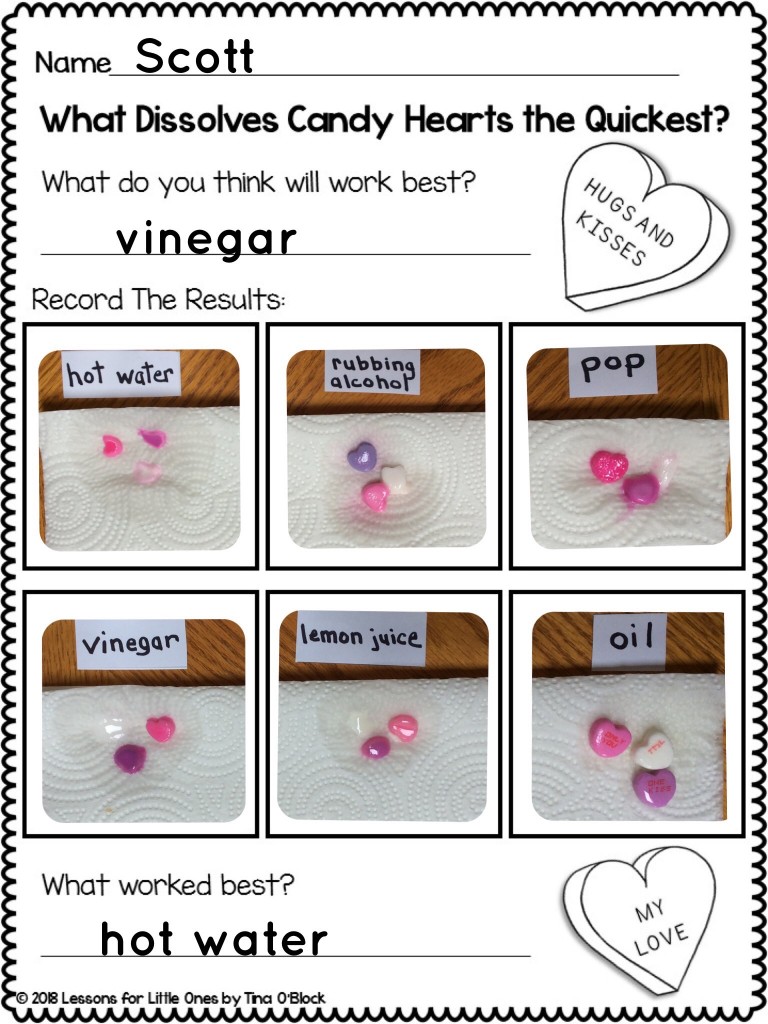
I like to extend this experiment further by challenging students to test whether hot water will still dissolve the candy hearts the quickest compared to other liquids.
We tested hot water, oil, vinegar, rubbing alcohol, lemon juice, pop (Sprite).
After looking at the liquids, students recorded which one they thought would dissolve the candy conversation hearts the quickest.

We then tested their hypotheses by adding candy conversation hearts to equal amounts of each liquid at the same time.

We observed the hearts for a while and then came back to them later in the day to see if there was any significant changes. Students wanted to let them soak overnight so that is what we did. The next day I took them out of the liquids so students could observe the results better.


The students were actually surprised that even up against all these other liquids, hot water still dissolved the hearts the quickest.
I explained that this experiment tested solubility – how well something can dissolve something else. Water is a universal solvent. It worked the best because water molecules have powerful magnetic properties that break apart the bonds that hold sugar molecules together. The molecules in the other liquids (especially the oil) are very different than water molecules and don’t attract the sugar molecules as well.
Students then recorded their findings and what worked best. Technology allows them to record the results more accurately by using real photos.


Candy Hearts STEM Challenge
The challenge is for students to build the tallest freestanding structure within the allotted time period of 10 minutes using gummy or marshmallow candy hearts and toothpicks.
Students can complete this challenge in pairs, teams, or individually.
Give each team or student 20 gumdrops and 40 toothpicks (amounts can be adjusted).
On your signal, students can begin constructing their gumdrop towers.


When time is up, students must step away from their towers.
Measure each tower from the table top to the highest point.
The winner is the structure that stands at the highest vertical point above the table.

After the challenge, I have students draw or take a picture of their structures and then reflect on what was easy, what was a challenge, and what they learned or would do differently. Since we did a similar gum drop challenge for Christmas, I liked to observe whether students transferred what they learned in the previous challenge to this one, and also whether using hearts instead of gum drops posed any more of a challenge.


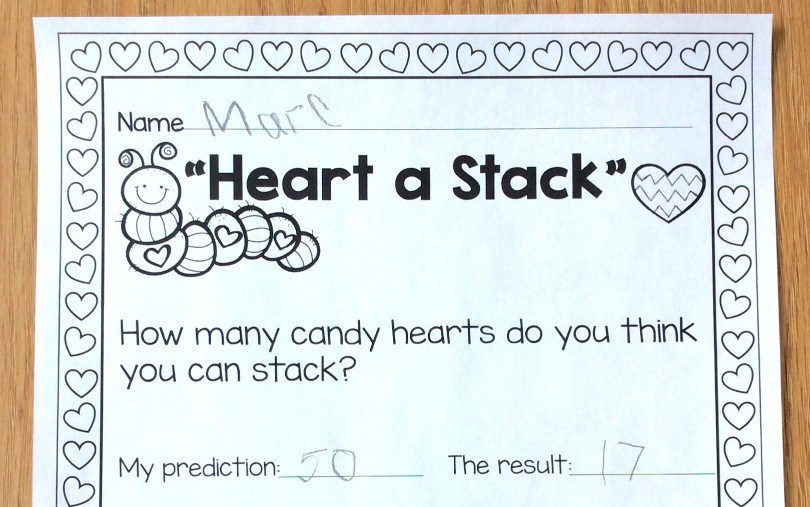
“Heart a Stack” STEM Activity
The object of the challenge is for each student to build the tallest candy heart tower by stacking the hearts on top of one another within the allotted time period. You can set it up similar to Minute to Win It and give them 1 minute to stack their hearts, or you can extend the time period.
You can use one size of candy hearts (the large size works best), give students a choice between small and large size hearts, or do separate challenges (one with the small hearts and one with the large hearts) and compare the results.
Prior to beginning the “Heart a Stack” Challenge, I have students estimate how many hearts they feel they will be able to stack. I give them a visual reference by stacking enough hearts to make a one-inch tower (we used both small and large candy conversation hearts).


On your signal, students can begin constructing their candy heart towers.
When time is up, students must step away from their towers.
Measure each tower from the table top to the highest point and count how many candy hearts were used.
The winner is the structure that stands the highest and/or the one that stacked the most hearts.
After the challenge, discuss the results. We found that alternating the direction of the hearts worked better than lining them all up, building a strong base at the bottom worked best, and the larger hearts were easier to stack than the smaller ones.


In addition to practicing estimation, counting, and measuring skills, you can use this challenge to practice patterns by requiring students to stack their hearts in a pattern.

After the challenge, I have students first record the actual results and then reflect on what was easy, what was a challenge or what they learned or would do differently.

Candy Hearts Sink or Float
Sink or float experiments are simple ways for young students to create and test hypotheses; plus, they just love putting things in water! I have to admit that we were all a bit surprised at the results of the candy conversation hearts!
You can choose to just test the candy conversation hearts or test a variety of candy hearts. We test a variety of hearts:
small candy conversation hearts
large candy conversation hearts
marshmallow hearts
Gummy Jube Jel hearts

Before placing each heart in the bowl of water, students predict whether they think each heart will sink or float.
I like to have my younger students draw their predictions for each item. Having them draw the heart in the bowl helps them understand the difference between what it means to sink or float.
I’ve had students draw their predictions on paper, and we have also used the Web Search tool in Pic Collage to find candy hearts and placed them in the bowls.

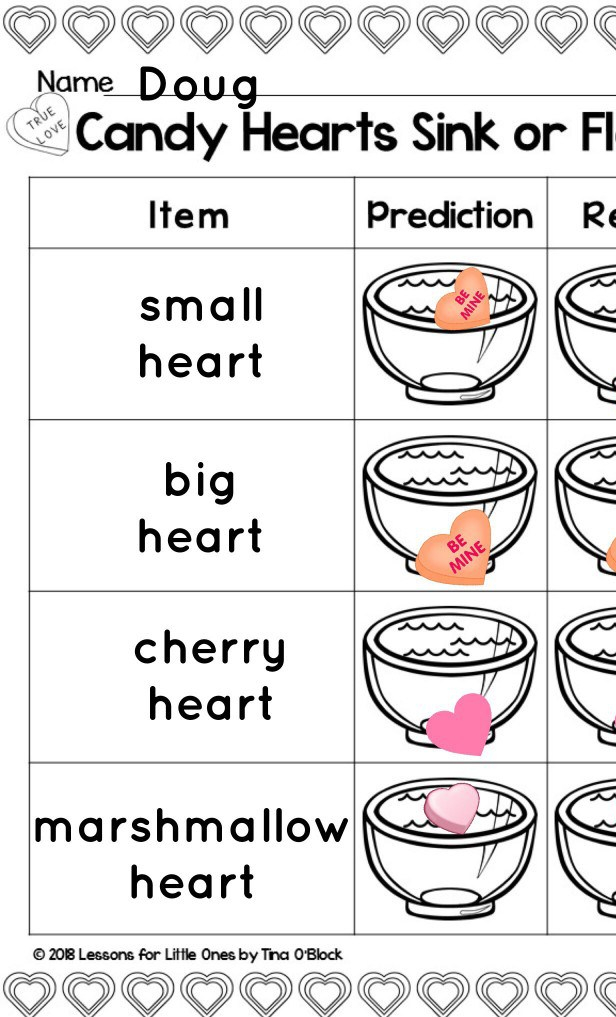
We test each heart individually by placing each one in the water one at a time. We were all a little surprised that the candy conversation hearts sank!
As we test each heart, students record the results.


Valentine Dancing Conversation Hearts Experiments
This is a very simple experiment that always gets a big reaction from students!
Before beginning the experiment, I explained to students that we were going to put candy Conversation Hearts in a glass of Sprite (any clear pop will work).
Students predict what they think will happen by circling one of the answers from their recording pages.
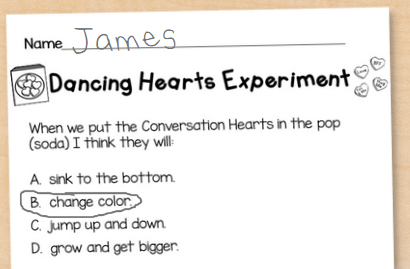
Students get so excited when they see the Conversation Hearts “dance” (jump up and down in the pop from the bubbles pushing them to the top and then popping making them fall back down). Here is a video of the action as well as some photos:

Afterwards, we discuss the results and students record their observations.

Optional additional experiment:
After completing the first experiment, I like to pose the question to students: Do you think the type of pop used will affect the results?
I then show them several different types of pops (sodas) that we are going to try next.

Students write their predictions on their recording pages.

I add a different brand of pop (soda) to each glass and then add a handful (approximately 15) of Conversation Hearts to each. They will all “dance” (move up and down) because of the carbonation. When the carbonation runs out of the pop (soda), the hearts will stop “dancing”.

After discussing the results, students draw and/or write their observations on their recording pages and then write what they learned.

Dancing & Flying Hearts Static Electricity Experiment
To prepare this experiment, cut tissue paper into heart shapes approximately 2-2 1/2 inches in height.

I tell students that I can lift the hearts and make them move without touching them, which leads to a discussion about how they think I will do it. For an added challenge, I tape the tips of the hearts to the table.
I then blow up a balloon and rub it on my hair for about 30 seconds to build up static electricity.
I place the balloon above the tissue paper hearts and carefully move it close enough to make the hearts rise up and then move the balloon around to make them “dance”. You can watch a video below as well as see photos of the experiment (if the hearts are not taped down, they fly up and stick to the balloon).


We discuss that invisible electrons with a negative charge build up on the surface of the balloon when you rub it through your hair or on your sweater. The invisible electrons with a negative charge can pull very light objects with a positive charge towards them (the tissue paper).
Afterwards, students draw and/or write what they observed on their recording pages or insert actual photos of the experiment in Pic Collage.


Younger students add photos to their Seesaw journals and record their observations and what they learned.
If you would like to use these Valentine science experiments and printable pages with your students, they are available here, along with detailed step-by-step directions with photos for each experiment and optional technology integration ideas. Click here or on the cover image below to download my Valentine Science and STEM resource.
♥ ♥ What other educators are saying about this resource: ♥ ♥
“This set had so many awesome experiments to do in the classroom. My classes loved trying all of these out. It comes with well put together worksheets and instructions. I will be using this every year!” – Kennedy M.
“Loved this. Came with plenty of experiment ideas. I set up science stations on Valentine’s Day. I had 100% engagement. There were so many activities that I didn’t get to use them all.” – Kayla M.
“My students loved all the activities! After doing these activities one of my students declared it was the best day ever at school!” – Kimberly N.
“This is a great resource! It’s easy to use, fun, engaging for the students, & a great learning tool! My students LOVED It & I loved how low prep and engaging it was! Thanks for creating an awesome resource!” – Sara J.
Have engaging science experiments and STEM activities throughout the entire school year with this money-saving Science & STEM Bundle!

Pin it for later!