We got our first real snowfalls of the year this past week. Young students get so excited about snow, so I decided to harness that enthusiasm and have some fun in the snow while incorporating science, math, and language arts.
Catching Snowflakes
If you are lucky enough to have it snow while you are in school, this activity is very fun and engaging. You will need magnifying glasses and/or a magnifying app and frozen sheets of black construction paper. I place sheets in the freezer a few days ahead of time if the weather is forecasting snow. Ask students if they think all snowflakes look alike and then tell them you are going to conduct an experiment to find out. Divide the students into groups and give each group a piece of frozen black construction paper. Catch snowflakes on the paper.

Observe the snowflakes with magnifying glasses. If using a magnifying app, step inside and quickly use the app to observe the snowflakes. Take pictures of the magnified snowflakes with the app or take screenshots.

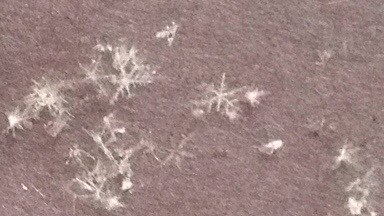
Discuss students’ observations. If you were able to take pictures or screenshots of the snowflakes, allow students to make posters of their snowflakes with Pic Collage or your favorite app or show their screenshots on the whiteboard.
Ask students why they think the snowflakes looked similar but not EXACTLY alike. Explain that snowflakes start out as crystal shapes that are fairly the same but as they travel down from the sky they encounter things such as dust, vapor, and temperature changes that alter their appearance. Students can draw the snowflakes they observed and write about their observations and what they learned in their journals.
It is also fun to bring snow inside and allow students to explore and play with it.
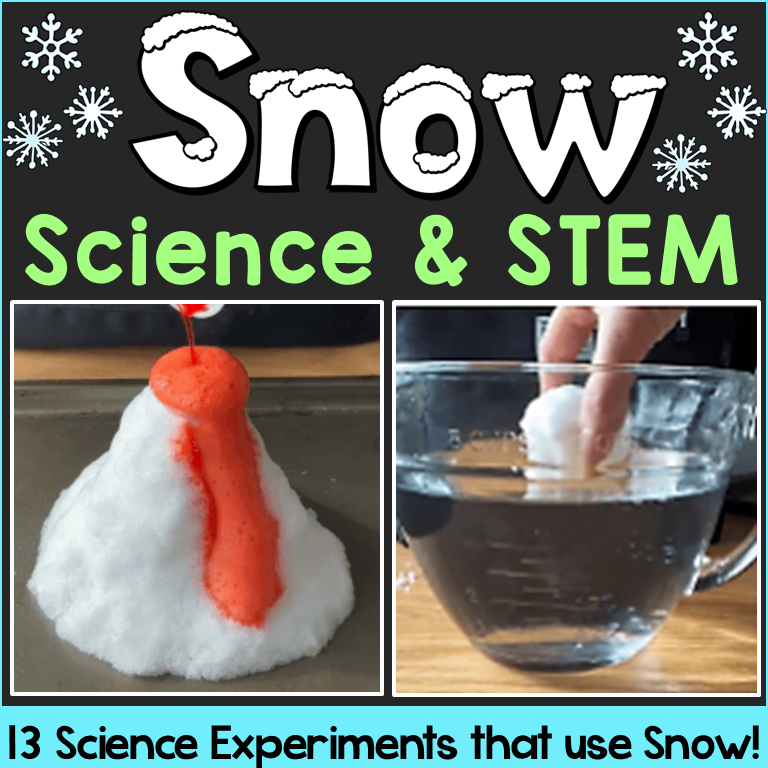
Will Snow Sink or Float?
This is a simple and fun science question to pose to students and test. I first have students record their hypotheses about whether they think snow will sink or float.

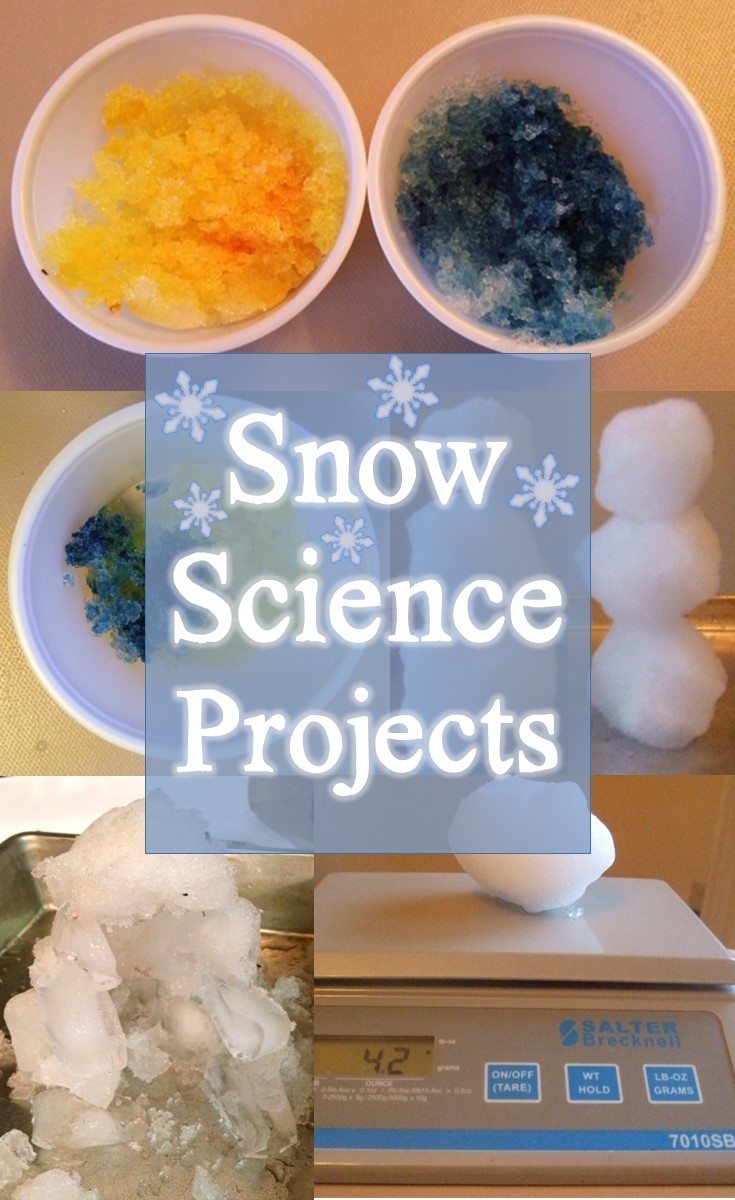
Then we test it by placing both loose snow and a tightly packed snowball in water.
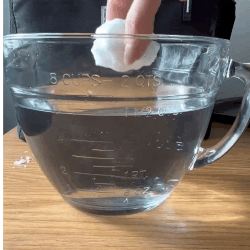


I explain to students that snow floats because it is less dense than water. I show them this concept by weighing the same amount of water, loose snow, and packed snow and discussing the difference.


Lastly, I have students draw what actually happened during the experiment and write what they learned. I like having them draw the results of the experiment because it helps me know if they understand the concept of sink or float by where they place the snow in the bowl.

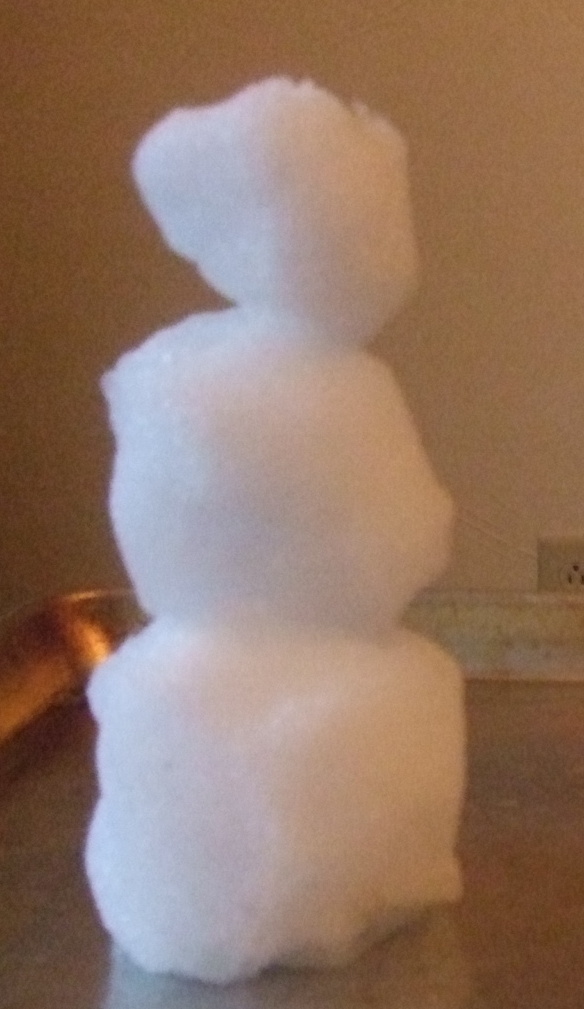
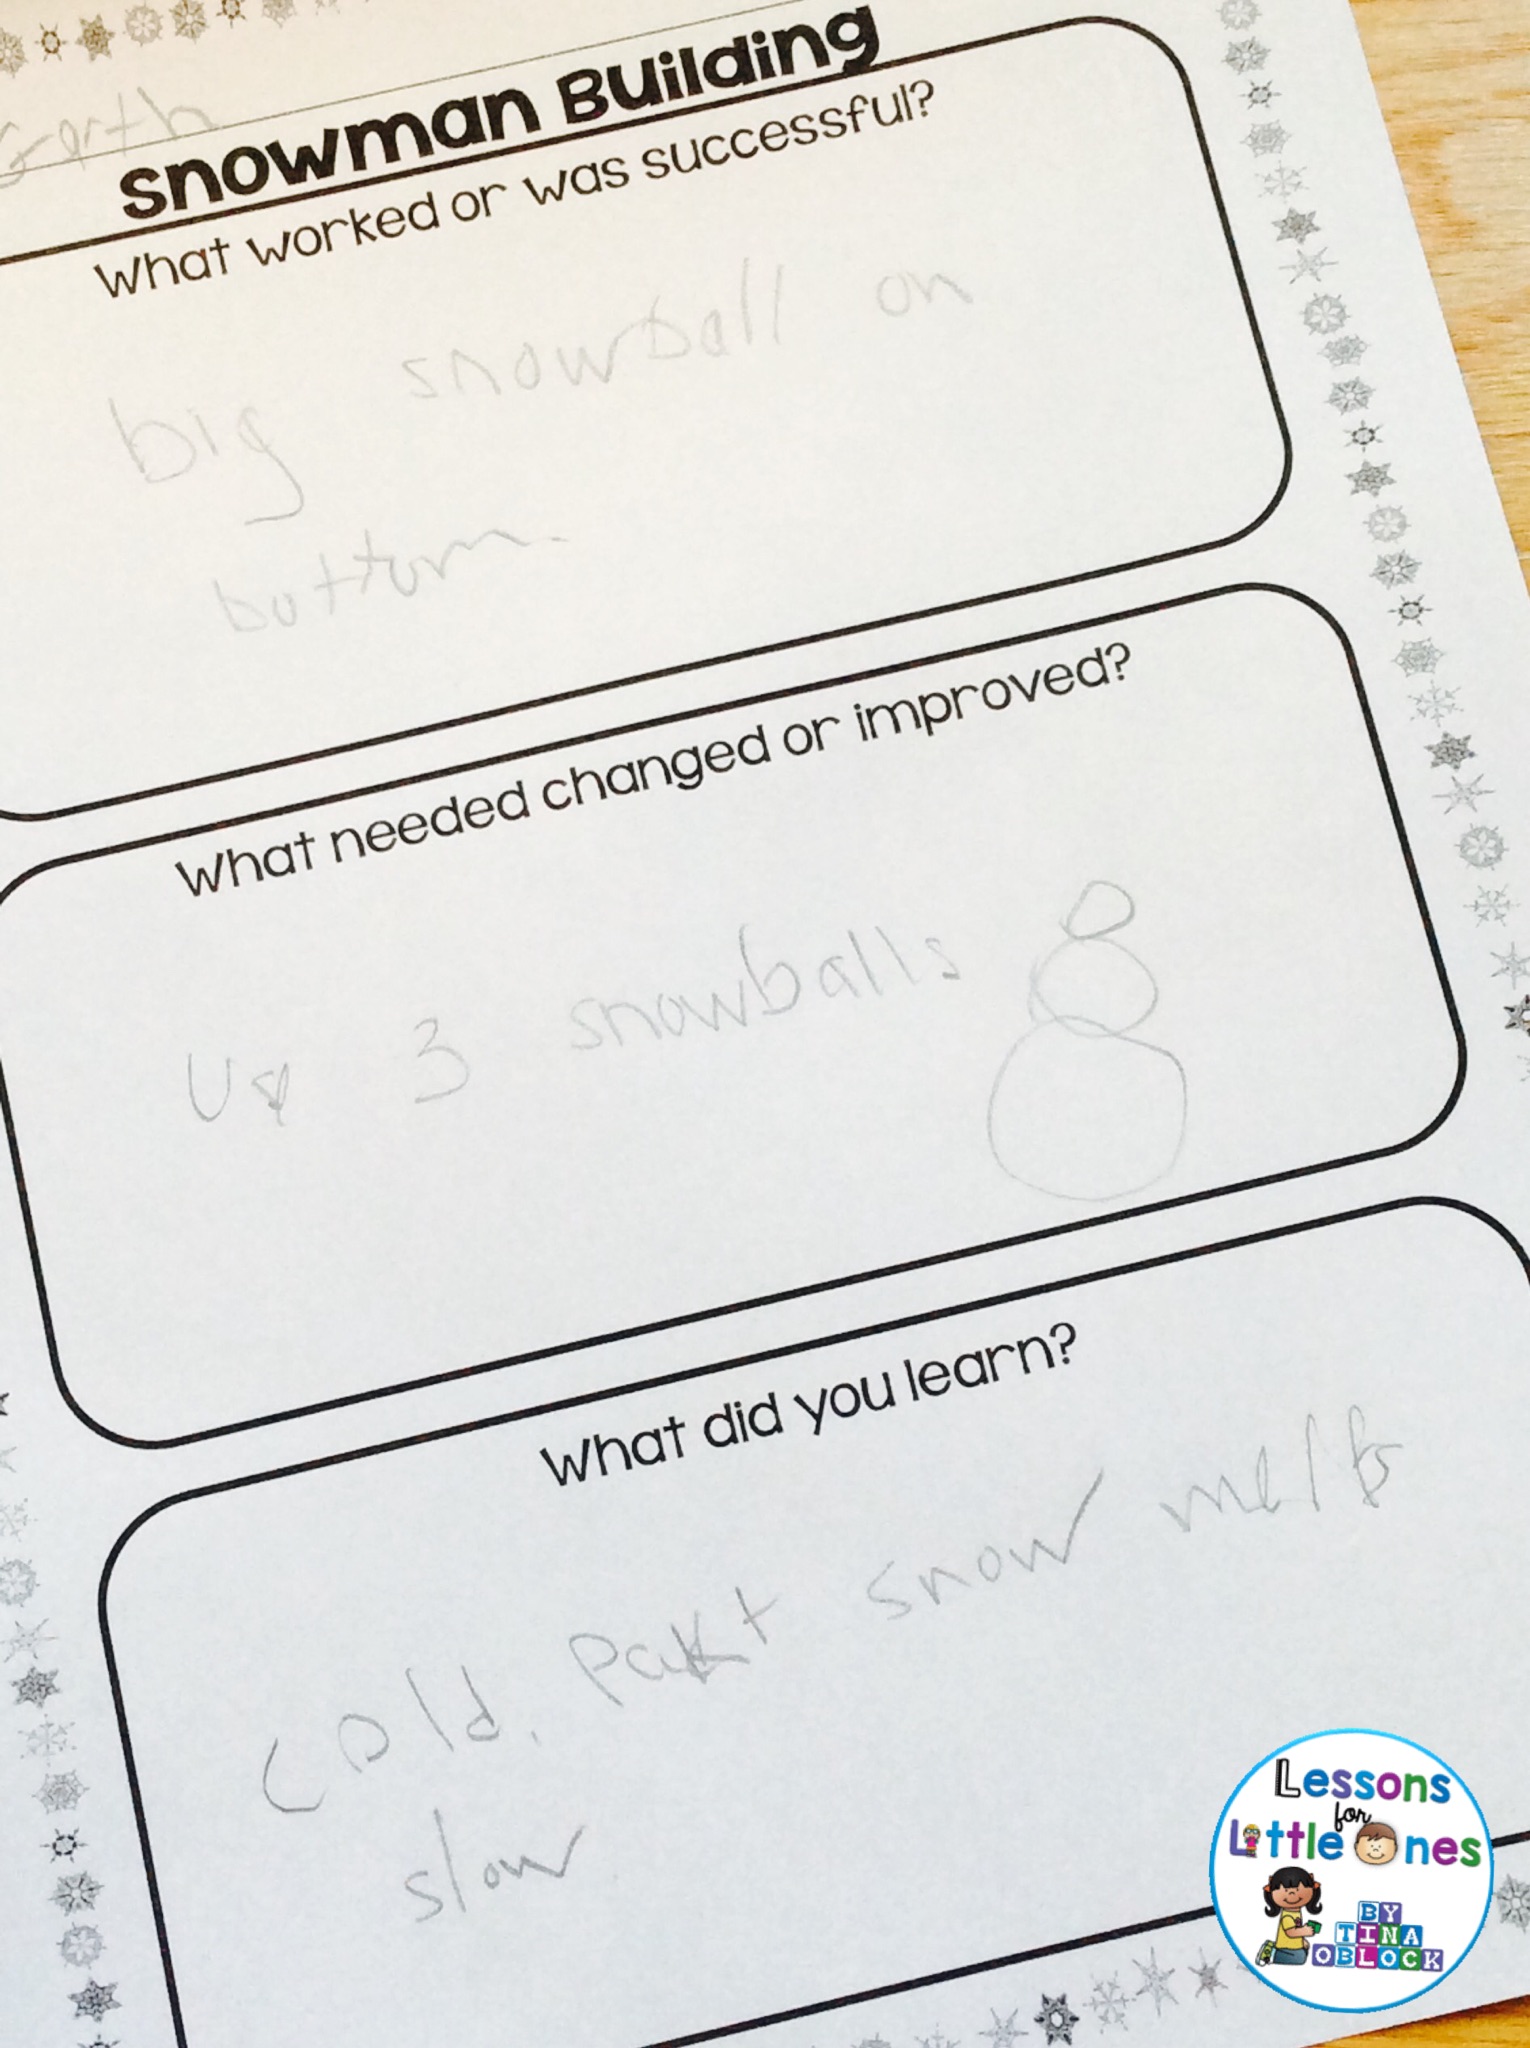
Snowman Building STEM Activity
I’ve done this next activity both inside and outside. The pictures I have are from inside so I will talk about that one first. We first discuss the density of snow with a few simple demonstrations. We weigh a loosely packed snowball and then a tightly packed snowball and discuss the results.


Then we complete a snowman building STEM activity. The challenge given is “How and where can we build a snowman that will last the longest?”. Each group is given the same amount of snow along with criteria they must follow. They construct a snowman in the allotted time period and place it in the area they feel it will last the longest.

I have also done the snowman building activity outside. Students decide where on the school grounds they think a snowman will last the longest and then build a snowman in that area. We check on them throughout the day and record the results. Afterwards, students reflect on what they learned.
What Melts Snow the Quickest?
I also like to let students experiment with testing what substance will melt snow the quickest. In this experiment we tested salt versus baking soda.
First students made their predictions.

Then we tested their hypotheses by filling 2 glasses with equal amounts of snow and adding equal amounts of salt and baking soda to the snow at the same time and observed the results.


We discovered that salt melts snow the quickest because salt lowers the freezing point of snow/ice which is why it is used on icy/snowy roads.

Mixing Oil and Snow Experiment
Another interesting substance to add to snow is oil. First students write their predictions/hypotheses.

Then test it out by pouring some oil on a cup of snow and observing the results. You will find that the oil and snow never mix – the snow (melted snow) stays on the bottom and the oil stays on the top. Even after mixing them with a spoon, the melted snow eventually goes to the bottom and the oil to the top.


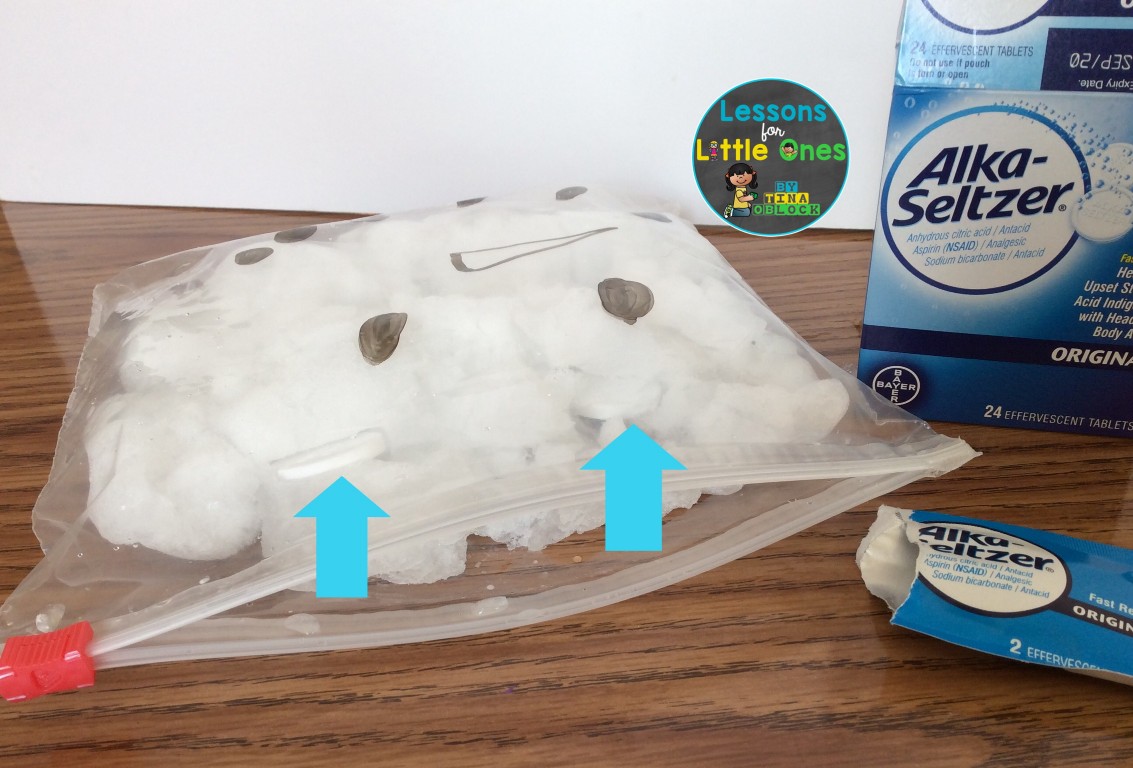
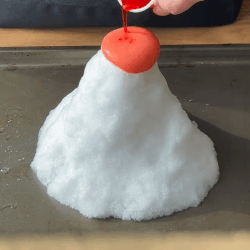
Alka-Seltzer Snow Experiment & Snow Volcano
Two fun and “explosive” snow experiments that teach students about the chemical reaction between an acid and a base are adding Alka-Seltzer tablets to a bag of snow and building a snow volcano. Not only do these experiments demonstrate a reaction but they also get many reactions from students lol!


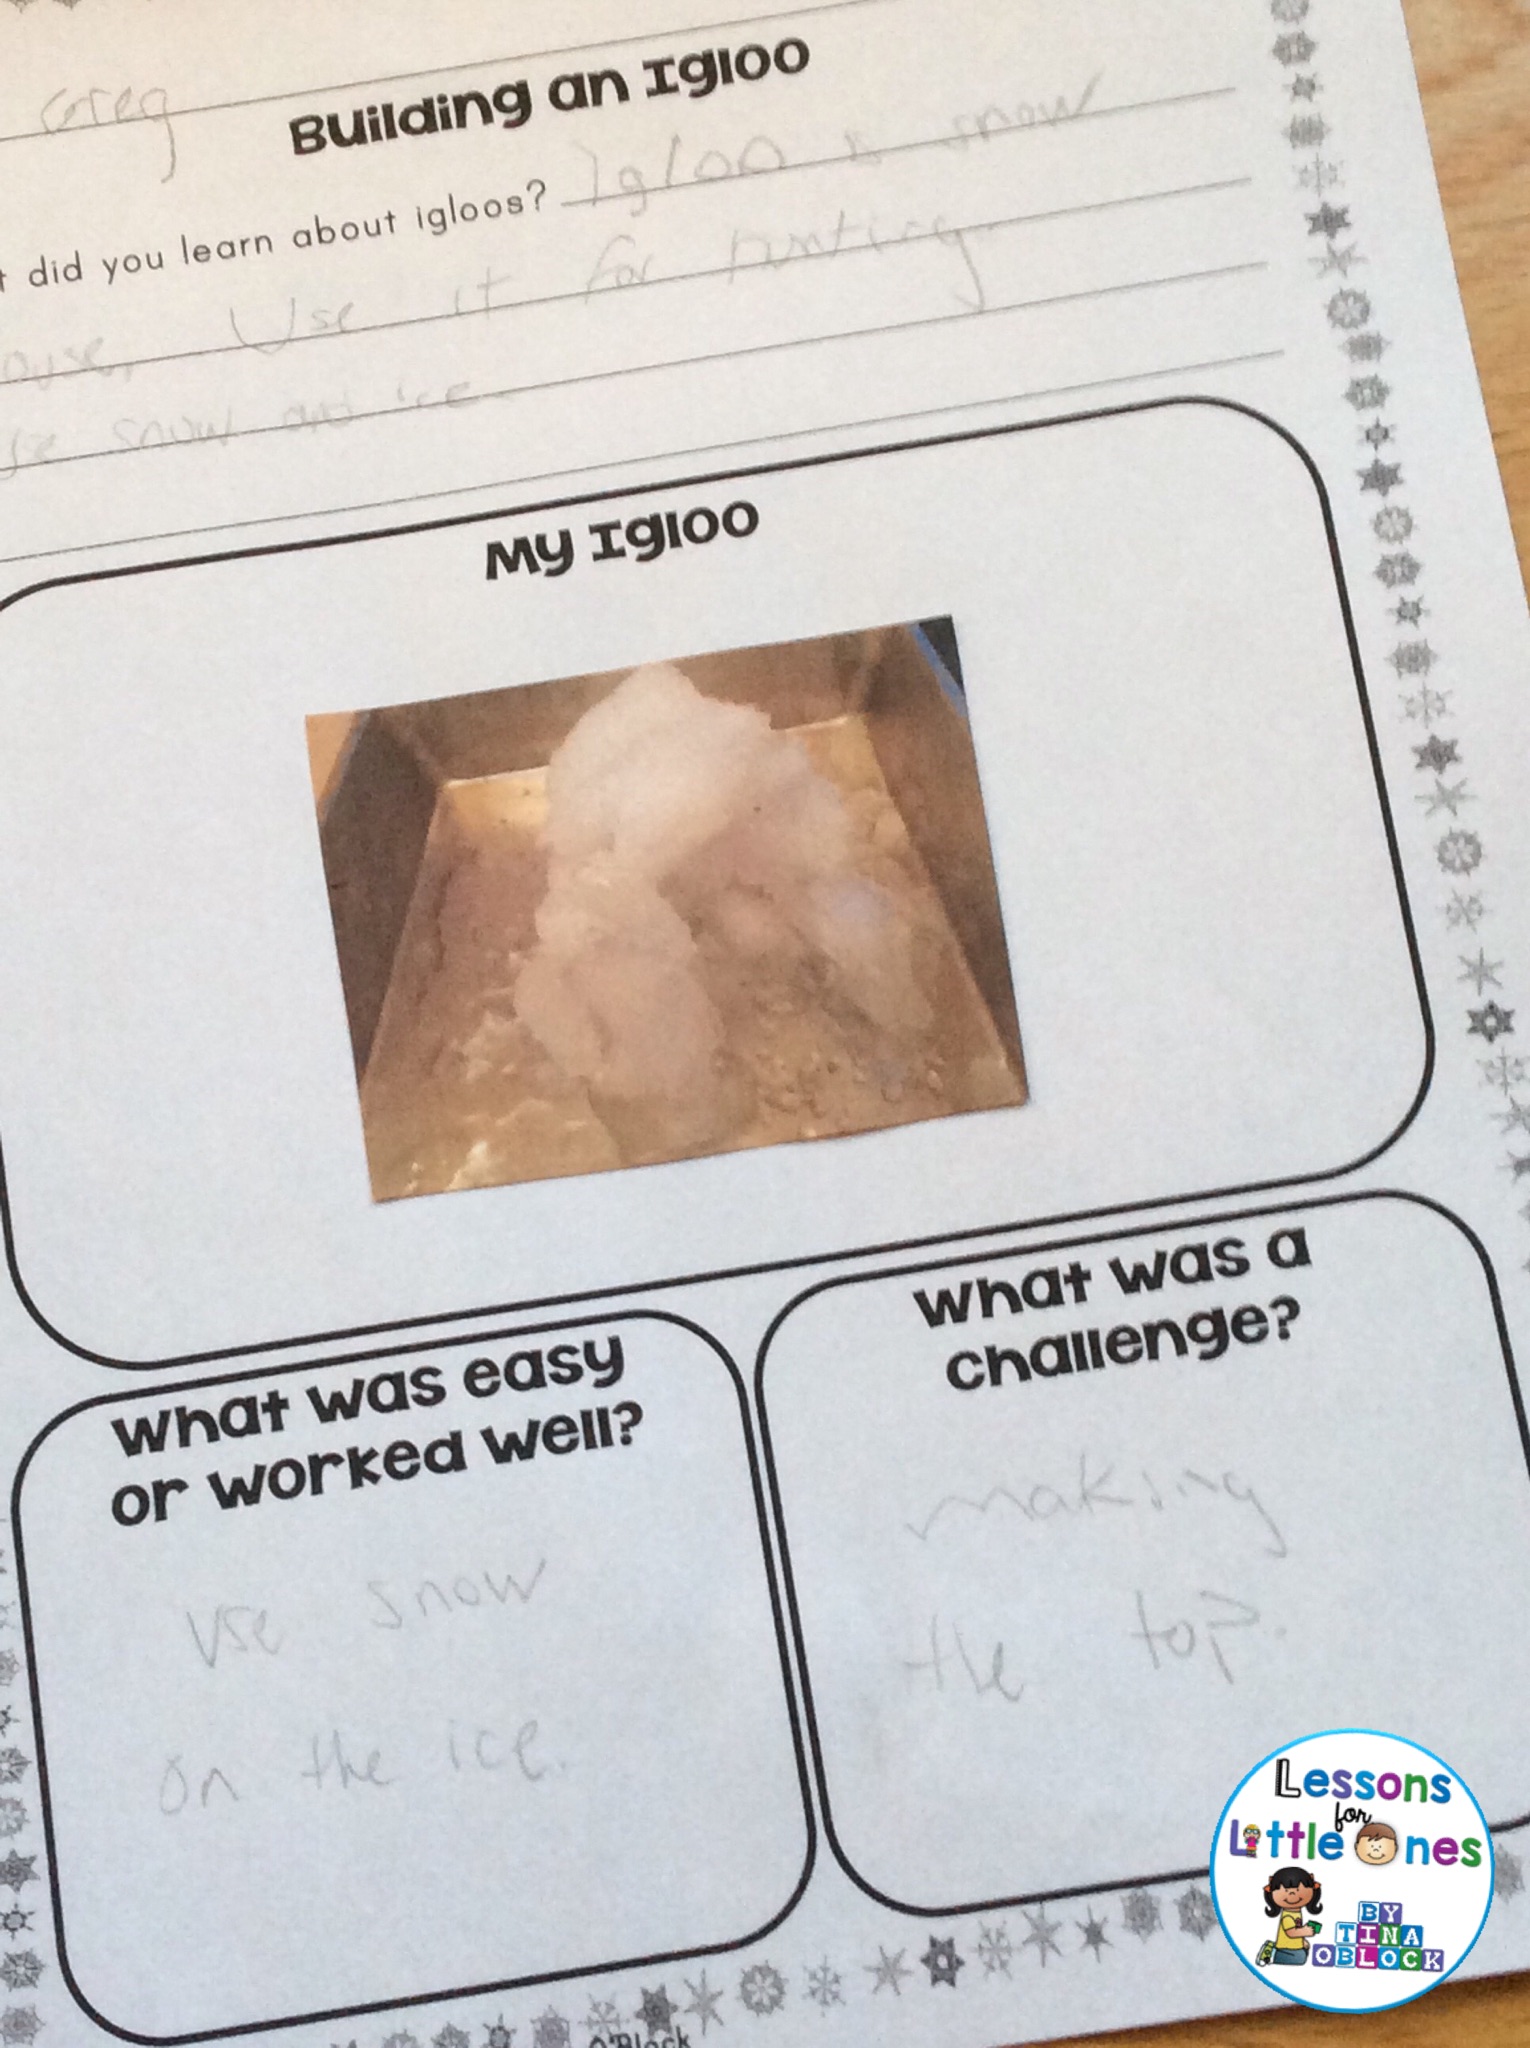
Igloo Building Activity
Another favorite snow building activity is igloo building. First we learn about igloos and watch an igloo building video. Then the students get to try to construct their own igloos using what they learned. They are given ice cubes of various sizes along with snow. They pack snow around an ice cube to form a block, and build igloos with the blocks.


Afterwards students discuss and write about what worked well, what didn’t work well, and what they learned.
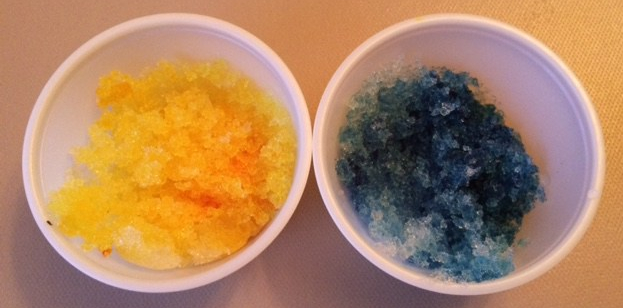
Color Mixing & Painting with Snow
This is a favorite of both myself and my students! We bring snow inside and add food coloring to it to form the primary colors.
Then I have students predict what they think will happen when the colors are mixed together.
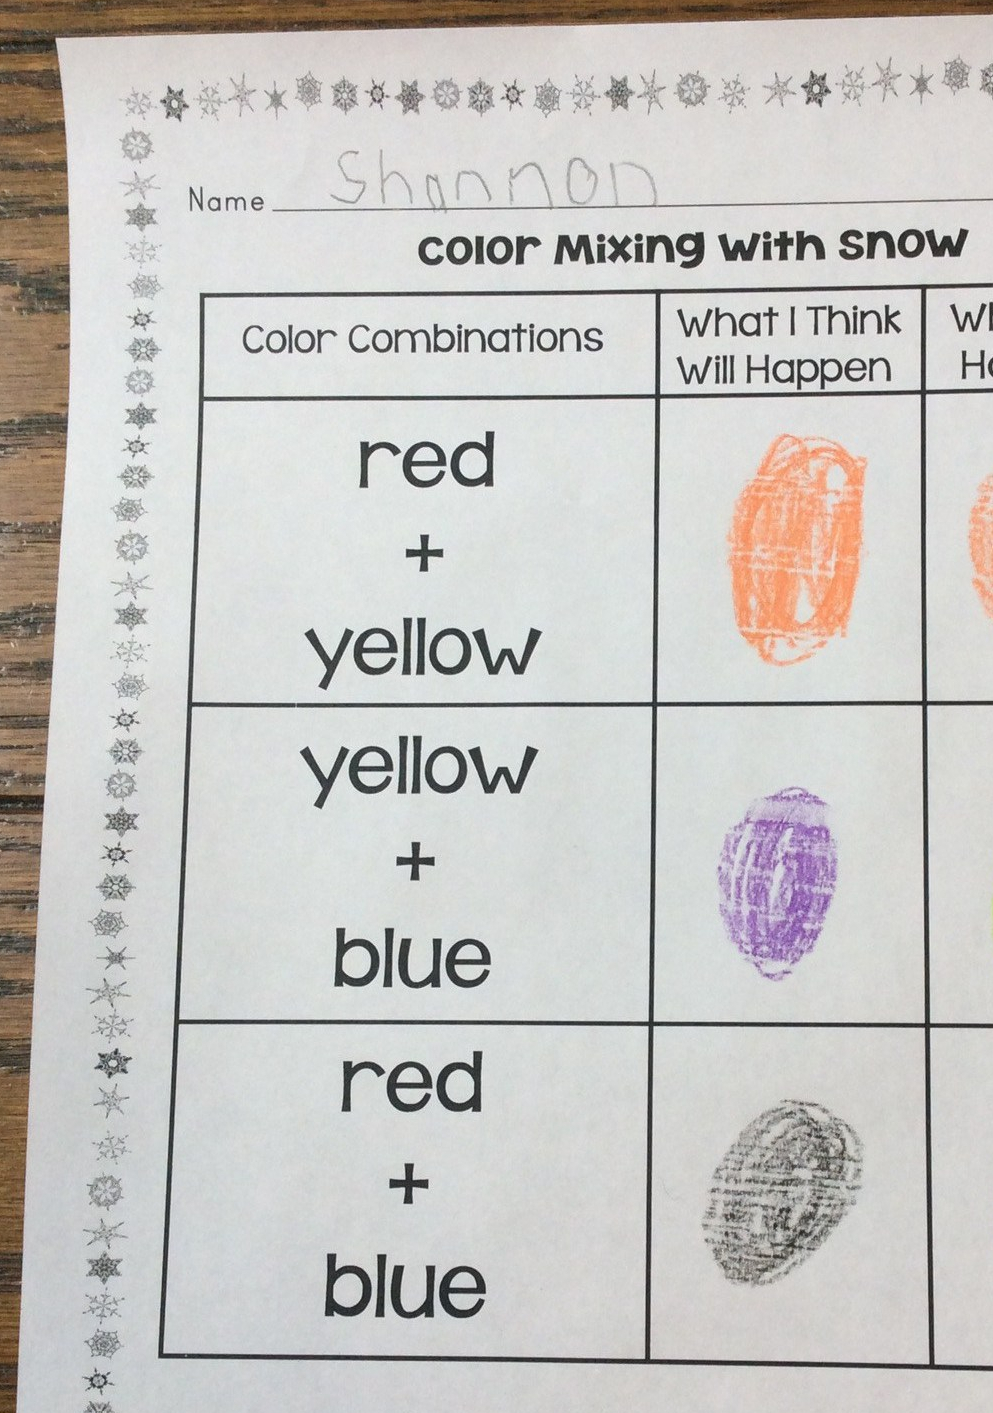
Next students have fun mixing the snow together and discovering what happens!


After the colors have been mixed, we experiment with adding more white snow to colors to see if it makes the colors lighter or darker. Students record their findings.

We also enjoy reading the book Mouse Paint by Ellen Stoll Walsh and using the colored snow to paint our own pictures.

How Much Liquid is in Snow?
Show a cup of snow and ask students how to change it from a solid to a liquid. Then ask how much liquid they think is in the cup of snow. Have them write their hypotheses or draw lines on a cup to show their water level guess.


Melt the cup of snow and allow students to compare their hypotheses with the actual results.

Explain that snow is actually a combination of snow and air and when snow melts, the air escapes.

How Clean is Snow?
Another question to pose to students is – “How clean is snow? Where can we find the cleanest and dirtiest snow?”. Record their ideas and then go outside and gather snow from each place and label the containers.
Melt the snow inside each container and observe each container with magnifying glasses or a magnifying app. List what you found in each container. Record and discuss the results and/or have students write about the results and what they learned.


If you would like more detailed instructions as well as the recording sheets, criteria pages, journal pages, videos, etc. from these experiments, as well as a few others, click here.
Have engaging science experiments and STEM activities throughout the entire school year with this money-saving Science & STEM Bundle!

You may also like:
Hibernation Activities
Pin it for later!