Coding has quickly become a favorite of myself and young students. Even NAEYC has realized its importance – “Early coding, or precoding, offers children experiences that integrate communication, thinking, and problem solving. These are 21st century skills that are valuable for children’s future success in our digital world.”
Since coding activities are so engaging for young students and incorporate a number of math, problem-solving, literacy, and communication standards, I wanted to combine them with one of our favorite books – The Mitten by Jan Brett. The events in the story lend themselves perfectly to coding!
Before beginning, we review what we learned about coding during our hour of code activities. We review that computers
The person who tells a computer what to do is a programmer. A programmer uses code to tell the computer what to do.
The code tells the computer exactly what to do and has to be written in the correct order or it will not work properly. A computer always follows a code exactly in the order it is written. The order that a computer follows the code is called a sequence. If the sequence is not correct, the program will not function properly.
Gross Motor Activity
This is a fun activity that I have been doing for years that helps students retell and act out the story. I “tweaked” it a bit so it would include coding practice as well.
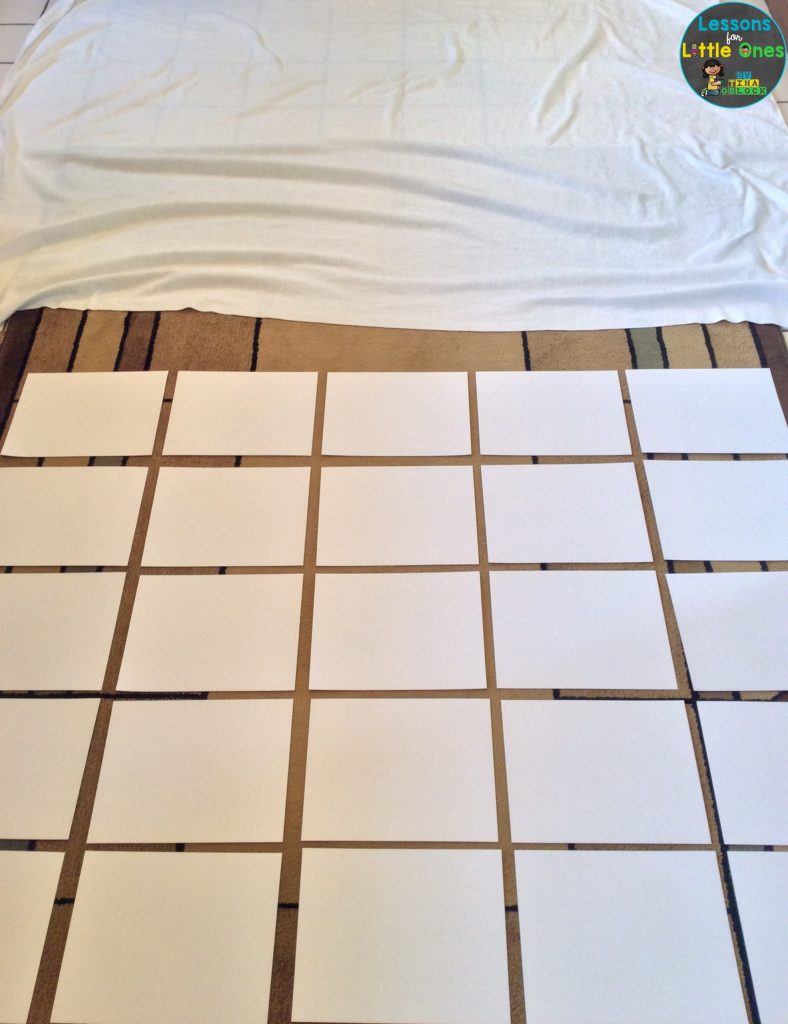
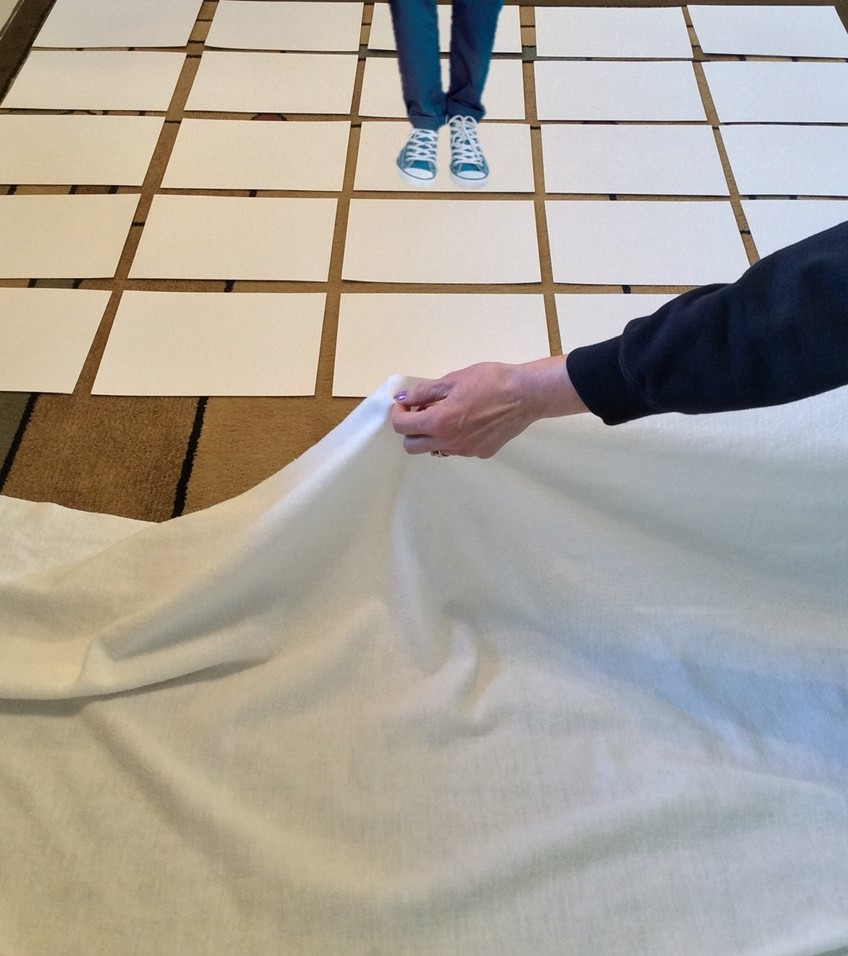
I took sheets of white card stock and made a grid formation to represent the snow. Then, I laid a large white sheet at one end of the grid to represent the mitten.
Students act like the animals in the story and follow code to get through the snow (paper grid) and into the mitten (the blanket). They step one square at a time through the grid (snow) to the blanket (mitten) and crawl under it (get inside the mitten). Once all 8 animals from the story are under the blanket (in the mitten) the child who is the bear yells “Aaaa-chew”, I pull up the blanket quickly, and all the animals (students) pop out. It is great fun!
Since this becomes a student favorite, we do the activity several days in a row and change how the coding directions are given.
Day 1: The first day I give oral directions for all of the coding so students “get the hang of it”. I choose a student to represent each animal (we review the sequence of the story and go in the same order) and orally direct them through the grid (snow) using directional coding words (forward, left, right, back). For each command, students can move 1 square OR sometimes I direct them to move more than 1 square by saying forward 2 (they move 2 squares forward). When they reach the last row, I direct them into the mitten (have them crawl under the blanket).
For younger students who may need visual cues as well as oral directions, I hold up directional arrow cards.
Day 2: I use non-verbal cues to direct the coding. I tap the student on the left shoulder to direct them to move left, I tap the student on the right shoulder to direct them to move right, I tap the student on the forehead to direct them to move forward, I tap the student on the back of the head to direct them to move backward. If I want them to move more than one square, I tap them multiple times.
Day 3: The students get to do the programming and direct the animals (fellow students) through the grid (snow). Before beginning, students program and write their code on a programming sheet. Then they orally read the code to the student representing the animal and direct them through the snow grid to the mitten (blanket).

This activity is not only fun for students but helps them with spatial reasoning, counting, problem-solving, communication skills, listening skills, sequencing, and retelling.
Hands-On Coding Activity
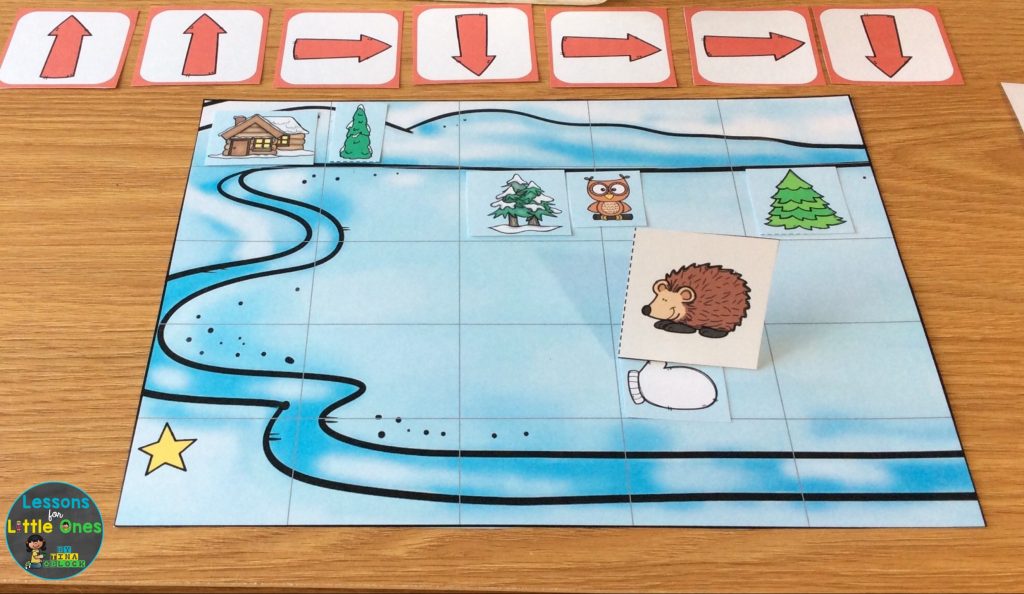
Next, students get to design a map or grid of a snow scene (setting from the book) and then act as programmers to design basic code in the correct sequence that will command a character from the book to follow the path and move to a select location (end point).
First, students pick and choose design pieces to place in any of the squares on the grid to create their setting. Since there are a number of different design pieces from which to choose, play is different each time.

Then, students choose an endpoint for their program. It can be any square on the grid. They can choose to end at an object (mitten,
Next, students use directional arrows coding cards to create the code in the correct sequence that will move the book character from the square with the gold star to the chosen endpoint.
We create movable book characters by either folding a paper clip upright and taping the character to it so it stands upright or placing the book character in a small binder clip so it stands upright.


Students then test their program by moving the book character according to the code and seeing if they reach the desired endpoint. I usually have students work in pairs, one student creates the code and the other student tests the code or they work cooperatively to both build and test their code.
This hands-on activity helps students visualize coding, improves their spatial reasoning and logic, helps them relate objects and locations to one another, challenges them to consider multiple paths for reaching their endpoints, improves their communication and cooperation skills, and helps them understand the importance of using the correct sequence when coding in order to get the desired result as well as the importance of testing code.
Printable Practice
Before students move on to digital coding practice, I like to have them practice on paper and also assess their understanding. I created pages that coordinate with the events from the book.
Students create the code for the highlighted path by drawing directional arrows in each coding box across the top. The starting point is always the bottom left box with the star.
Here is an example of one of the pages where the path leads the rabbit to the mitten. I have pages for the following events that are not pictured:
– the path leads grandma to her ball of yarn (the yarn she uses to make Nicki’s mittens)
– the path leads Nicki to his grandmother to get his mitten
– the path leads Nicki through the snow to play and to the place where he loses his mitten
– the path leads each animal from the story through the snow to the mitten
– the path leads Nicki to his lost mitten
– the path leads Nicki back home to his grandma

Digital Story Coding
Once students feel more comfortable with coding for the story, we move on to digital practice with Boom Cards.
I like using Boom Cards because they are self-checking and have audio directions so young students can complete them independently. Also, I receive data on each student so I can assess their understanding.
Students love using the Boom Cards because they are interactive, engaging, and game-like.
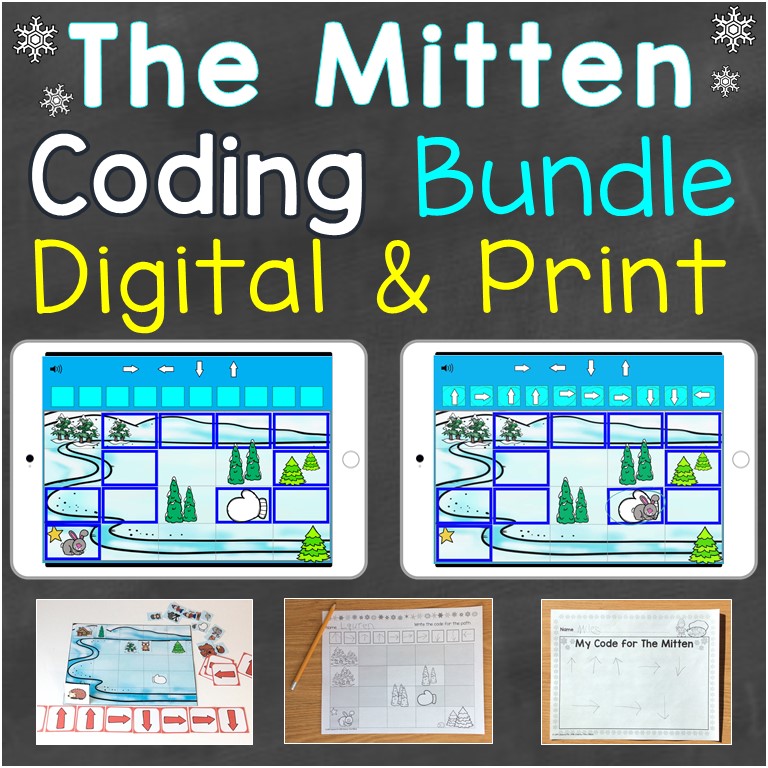
Students create the code for the highlighted blue path by dragging and dropping the arrows to the coding boxes above the picture. They then move the book character from the box with the gold star along the path according to the code they created.


This helps students learn the importance of creating each step of code in the correct sequence in order to get the desired response, why sequence matters in a computer program, and the importance of checking/testin code.
If you would like to use any of these coding activities for The Mitten with your students, click any of the links below:
The Mitten Coding Practice Bundle – Print & Digital Activities
The Mitten Printable Coding Practice – Print Activities Only

The Mitten Coding Practice Digital Boom Cards